
Gather the chicken, mushroom, and winter squash pot pie ingredients
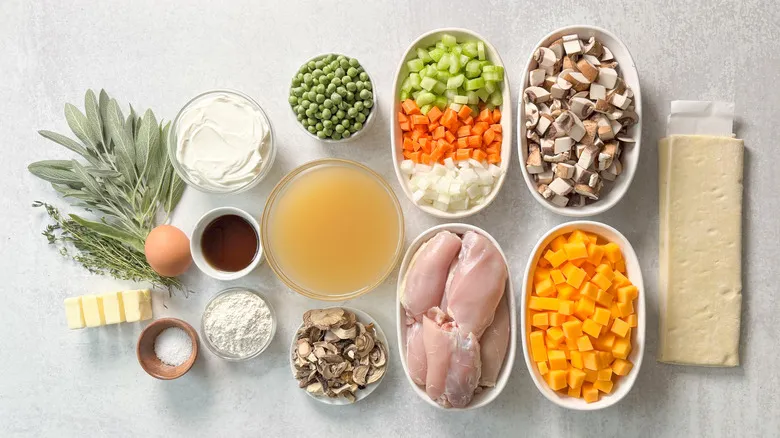
This robust pot pie is brimming with rich mushroom flavor, beginning with a selection of mixed dried mushrooms such as porcini, trumpet, oyster, or any of your preferred types. These mushrooms are simply soaked in hot water to rehydrate, or you can use a clever French press method. Boneless, skinless chicken thighs are seared in unsalted butter and seasoned with kosher salt before being removed and chopped. Next, a "mirepoix" of diced onion, celery, and carrots is sautéed alongside cubed butternut squash. Fresh cremini mushrooms are cooked down with the vegetables, and then dry sherry is added to deglaze the pot. Fresh English peas, rehydrated mushrooms, fresh sage, and thyme, along with the chopped chicken, are incorporated back into the mixture. A dusting of all-purpose flour helps thicken the sauce, complemented by low-sodium chicken broth and sour cream. Packaged frozen puff pastry sheets are thawed, rolled out, cut into strips, and arranged in a lattice over the chicken and vegetable filling. An egg wash made from one whole egg mixed with water gives the baked pastry a beautiful sheen.
Step 1: Soak the dried mushrooms
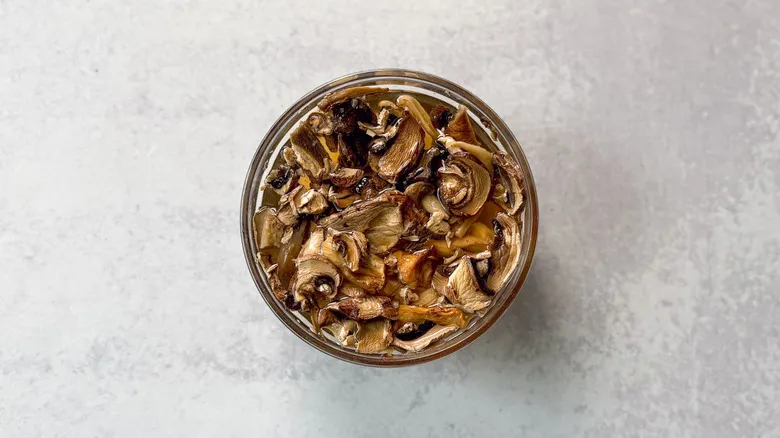
Put the dried mushrooms in a small heat-resistant bowl and pour boiling water over them. Allow them to soak for 30 minutes until they feel warm and have softened.
Step 2: Remove the mushrooms from the soaking liquid

Remove the mushrooms from the soaking liquid (allow the sediment to settle at the bottom), roughly chop them, and set aside.
Step 3: Melt butter in a large pot
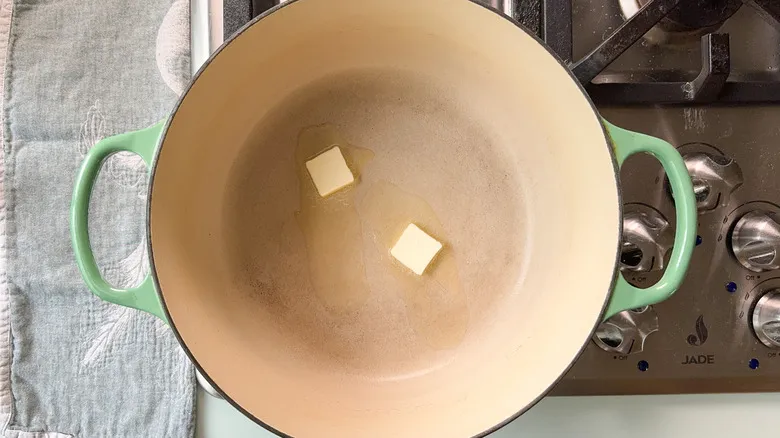
Preheat a large Dutch oven or another pan over medium-high heat and incorporate 2 tablespoons of butter.
Step 4: Add the chicken thighs

After the butter has melted, incorporate the chicken thighs.
Step 5: Season and cook the chicken on both sides
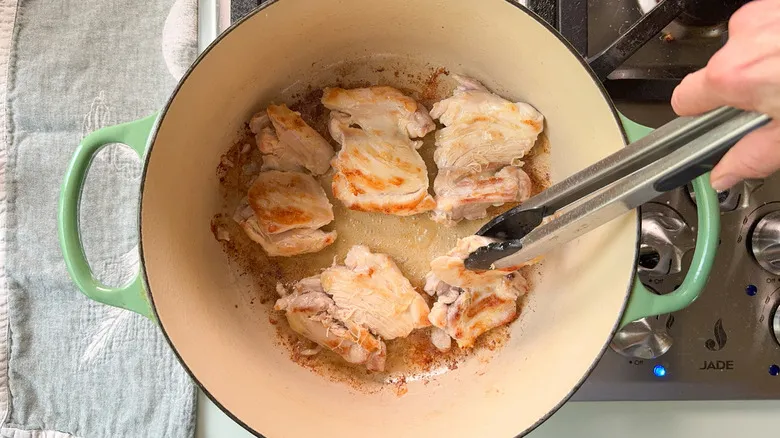
Sprinkle with ½ teaspoon of salt and cook on each side until they are golden brown and fully cooked.
Step 6: Remove chicken from pan and chop
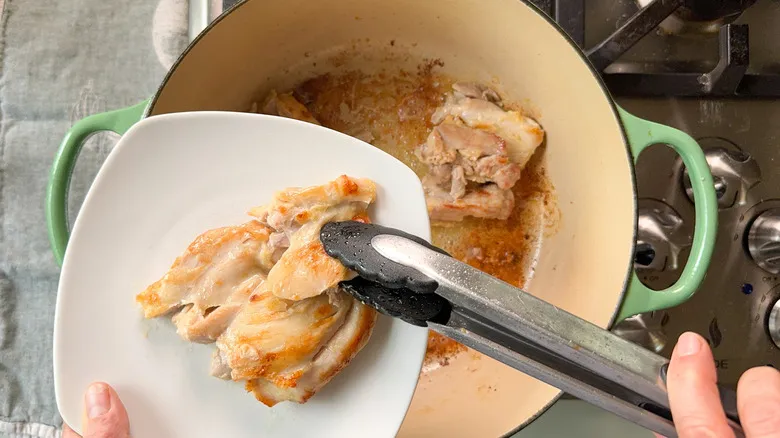
Take the chicken out of the pan, roughly chop it, and set it aside.
Step 7: Add the remaining butter and vegetables
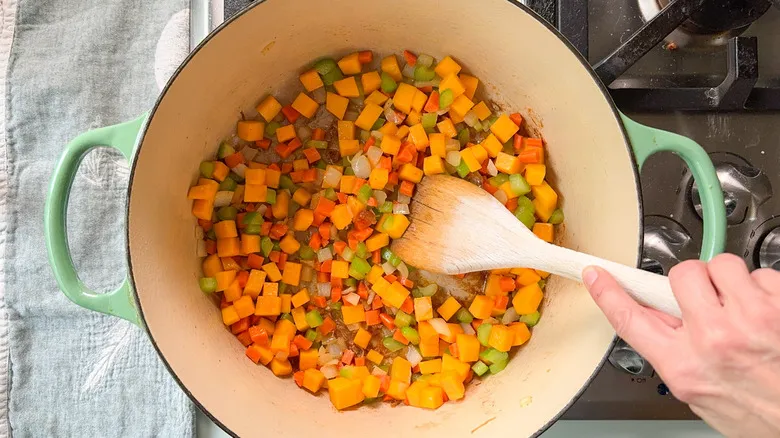
Incorporate the remaining 2 tablespoons of butter along with the onion, celery, carrot, and butternut squash into the pan. Sauté and stir occasionally until the vegetables begin to soften, which should take around 10 minutes.
Step 8: Add the fresh mushrooms

Incorporate the fresh mushrooms and sauté until they release their juices, which should take approximately 10 more minutes.
Step 9: Add the sherry

Pour in the sherry and mix, making sure to scrape up the browned bits from the bottom of the pan.
Step 10: Add the peas and soaked mushrooms
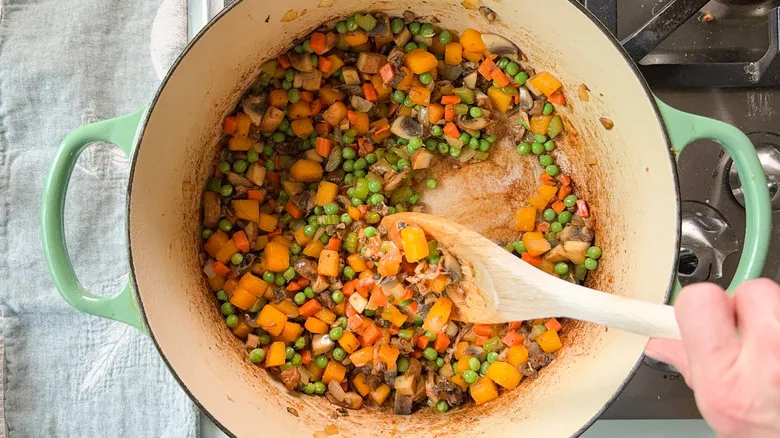
Incorporate the peas and the diced soaked mushrooms.
Step 11: Sprinkle the vegetables with some flour
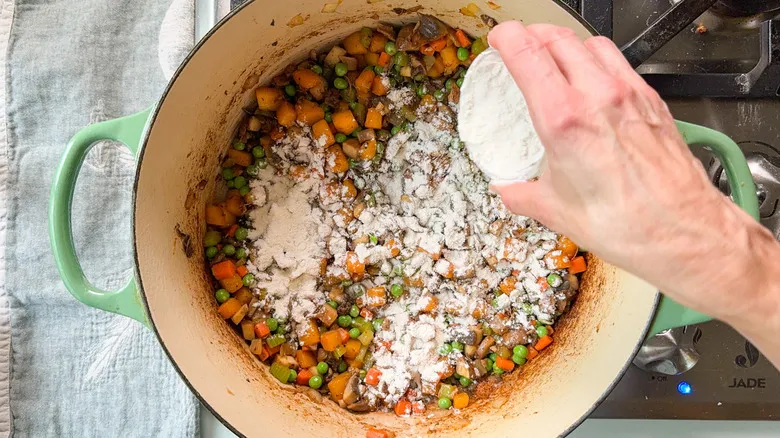
Dust the vegetables with ¼ cup of flour.
Step 12: Stir to coat
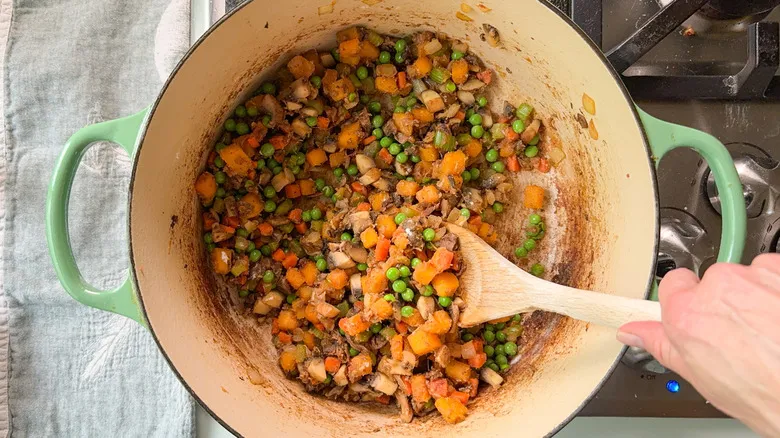
Mix to coat and cook for 1 minute, stirring continuously.
Step 13: Add cooked chicken and herbs
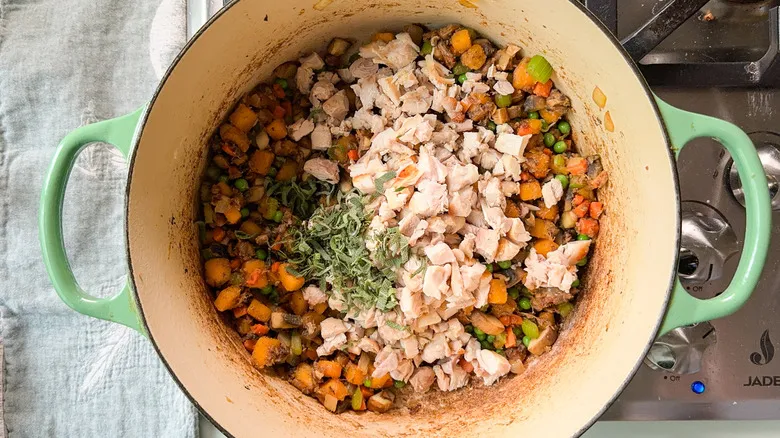
Incorporate the cooked chicken, herbs, and the rest of the salt into the pan.
Step 14: Add the chicken broth
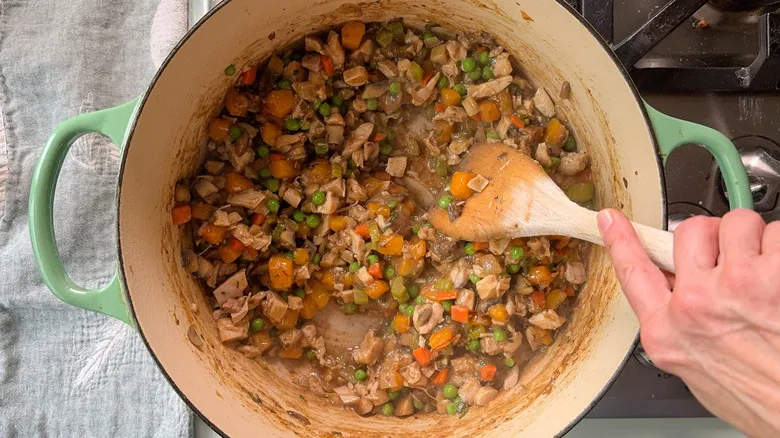
Incorporate the chicken broth and simmer until the mixture thickens a bit.
Step 15: Add the sour cream
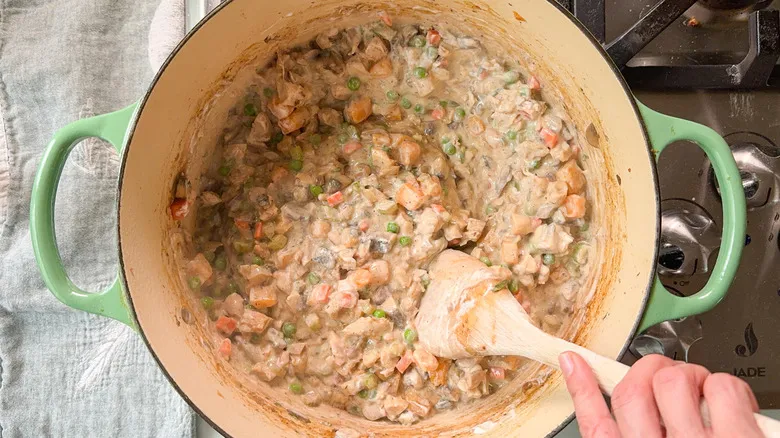
Incorporate the sour cream and lower the heat to a simmer. Continue to cook and stir for an additional minute or until the mixture reaches a thick consistency. Take the pan off the heat.
Step 16: Preheat the oven
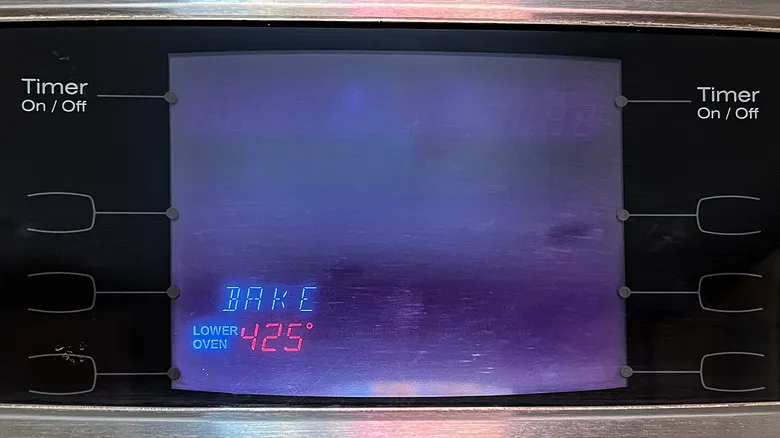
Set the oven temperature to 425°F.
Step 17: Oil a casserole dish
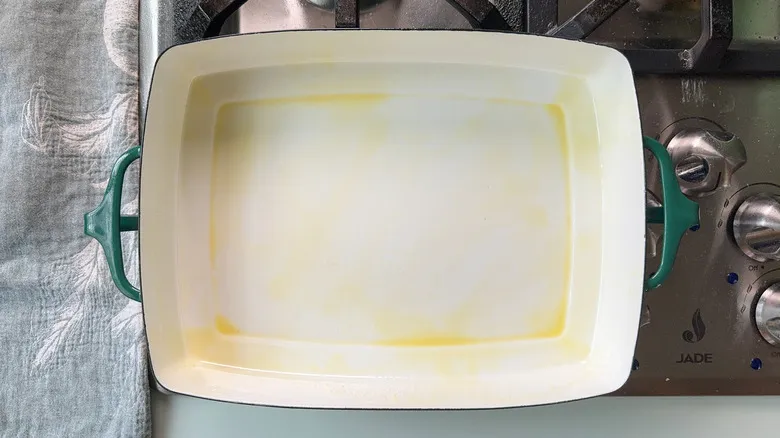
Grease a 13 x 9-inch baking or casserole dish.
Step 18: Add the filling to the pan
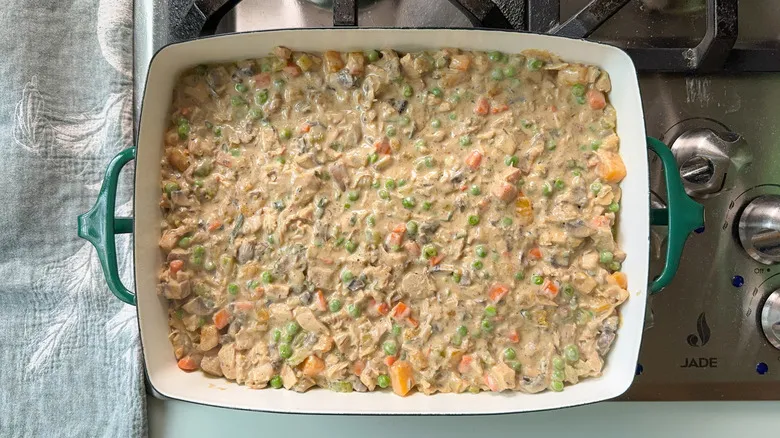
Spread the filling evenly and let it cool a bit while you roll out the pastry.
Step 19: Sprinkle a work surface with flour
Dust a work surface with a small amount of the leftover flour.
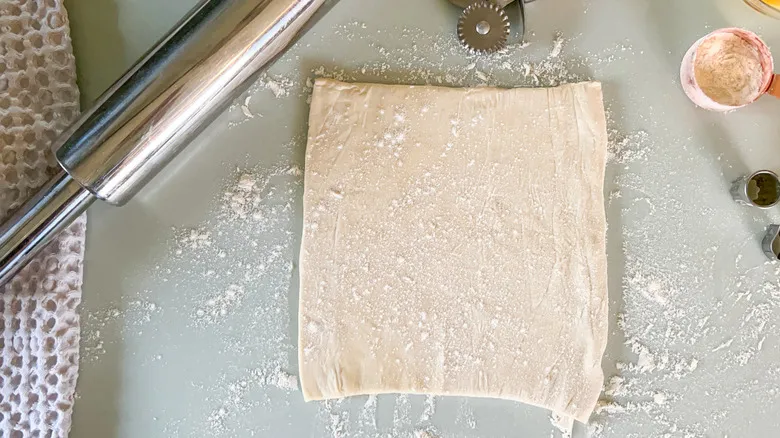
Step 20: Roll out the first sheet of puff pastry
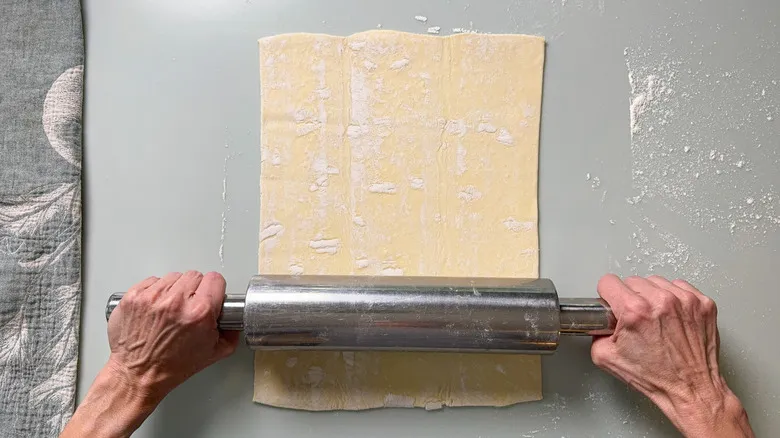
Flatten one sheet of pastry into a rectangle measuring 14 by 10 inches.
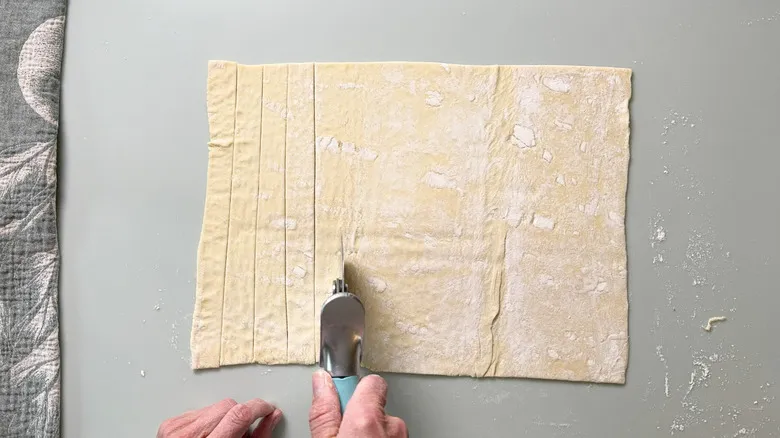
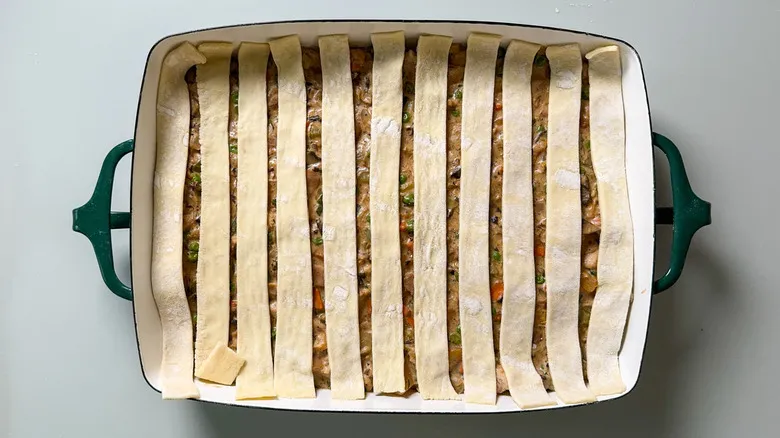
Step 21: Cut the pastry into 12 strips
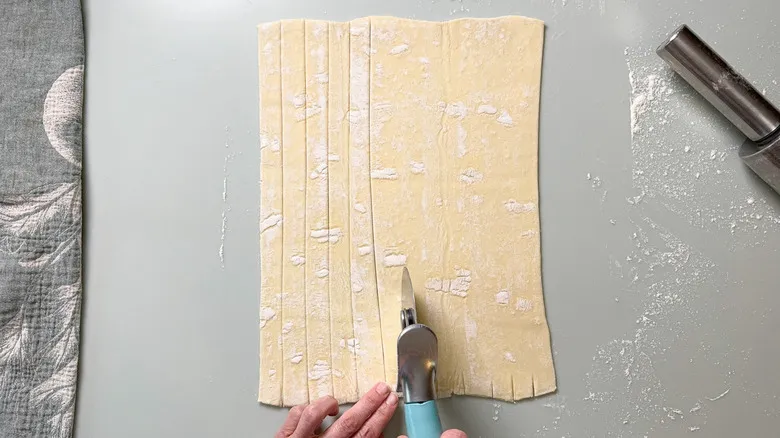
Utilize a pizza cutter or a sharp knife to slice the pastry into 12 long strips.
Step 22: Roll out the second sheet of pastry and cut into strips
Perform the same procedure with the second pastry sheet, but this time slice the strips in the reverse direction.
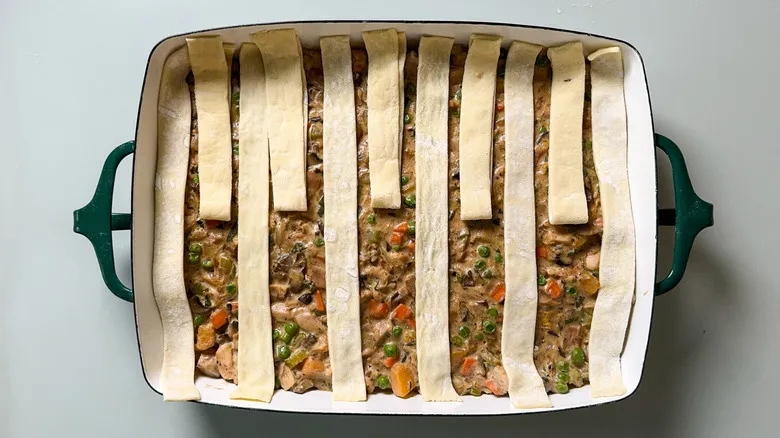
Step 23: Lay the shorter strips across the filling
Place the shorter strips over the filling horizontally to fit.
Step 24: Fold back some strips
Bend back every alternate strip.
Step 25: Lay one long strip across the middle
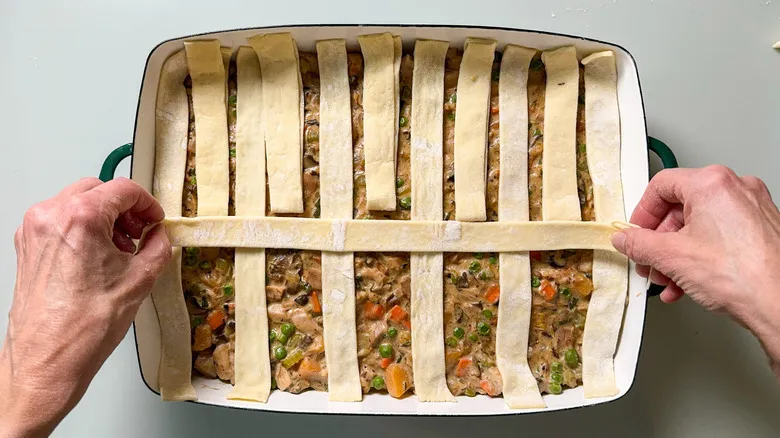
Place one of the longer strips across in the opposite orientation.
Step 26: Fold the strips
Bend the strips back over the top.
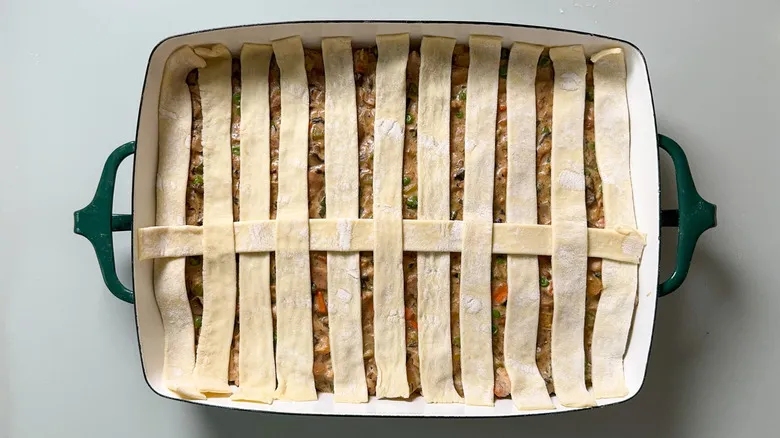
Step 27: Continue to weave the lattice
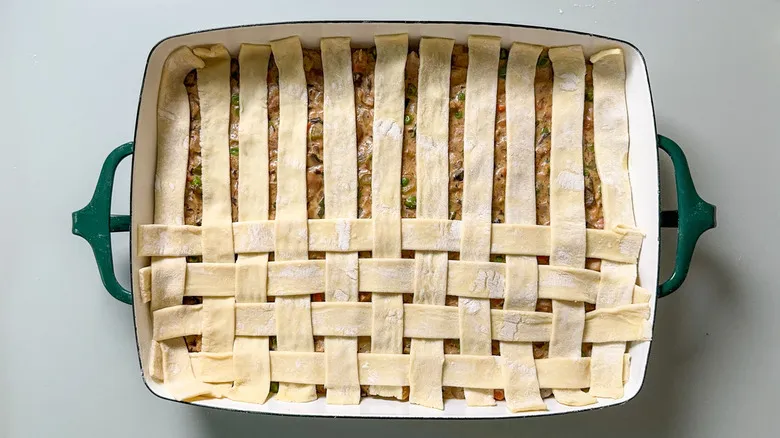
Continue this procedure until you reach the bottom edge of the pan, folding back alternating strips each time and doing the same for the second half of the pan.
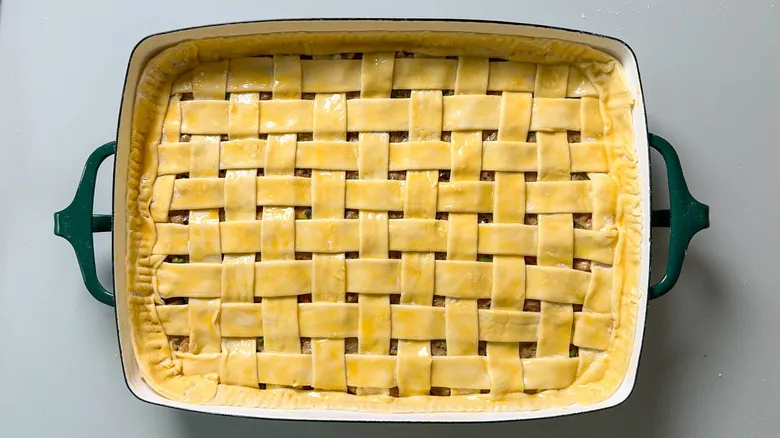
Step 28: Press extra strips around the edges
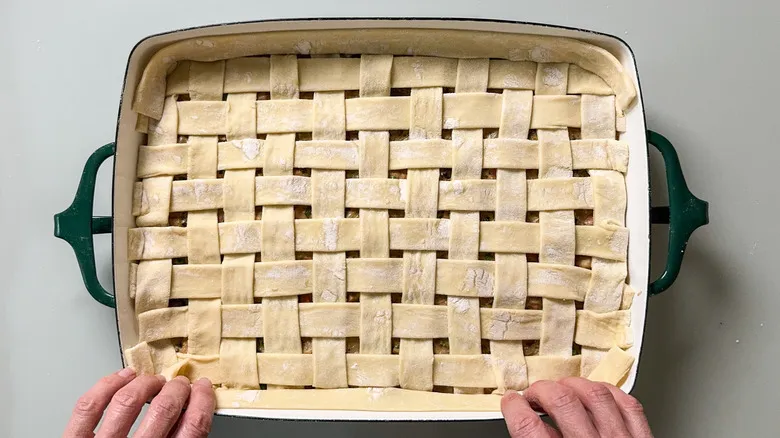
Utilize any additional strips to secure around the edges of the pan.
Step 29: Crimp the edge
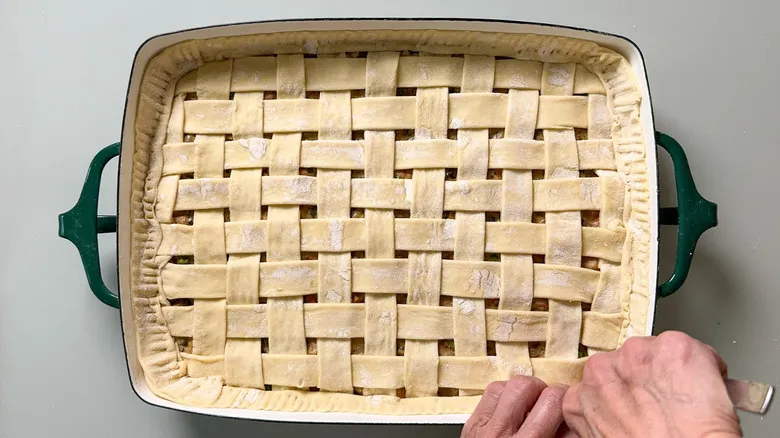
Press the edge with a fork to create a crimped design.
Step 30: Make an egg wash
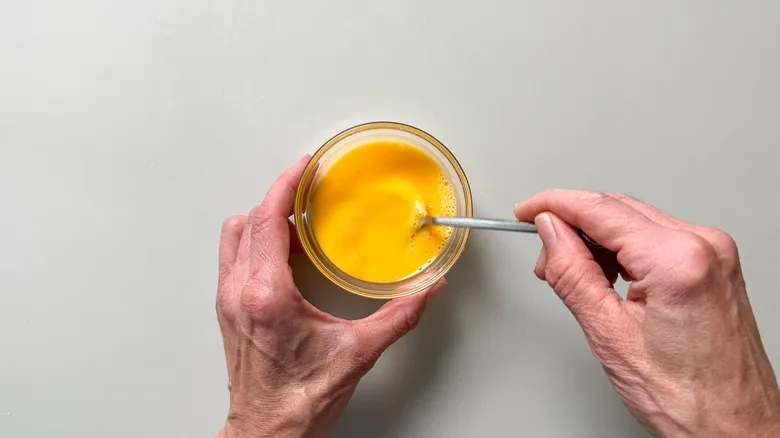
In a small bowl, combine the egg with 1 teaspoon of water and whisk until blended.
Step 31: Egg wash the lattice crust

Apply a bit of the egg wash to the pastry strips.
Step 32: Bake the pot pie
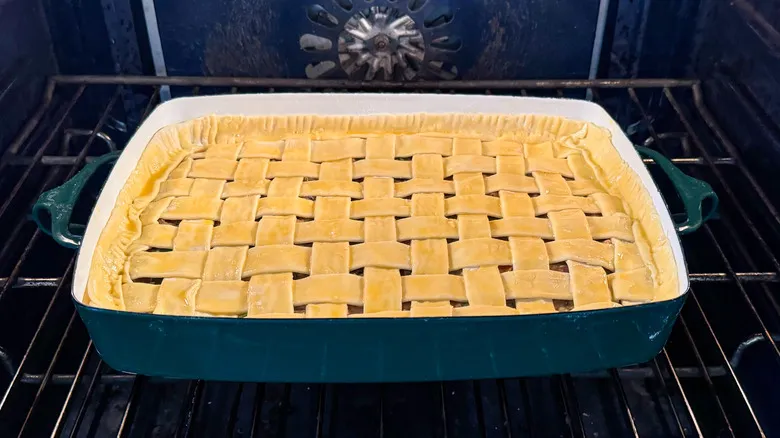
Cook the pot pie in the oven for 20 minutes.
Step 33: Turn the oven down
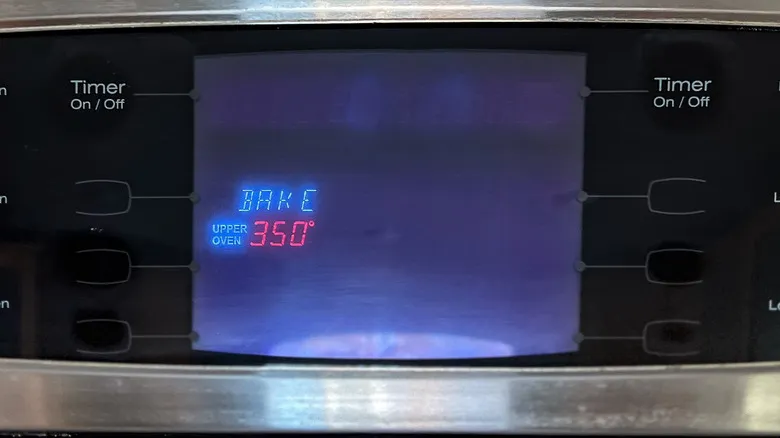
Reduce the oven temperature to 350°F.
Step 34: Bake the pot pie 15 minutes longer
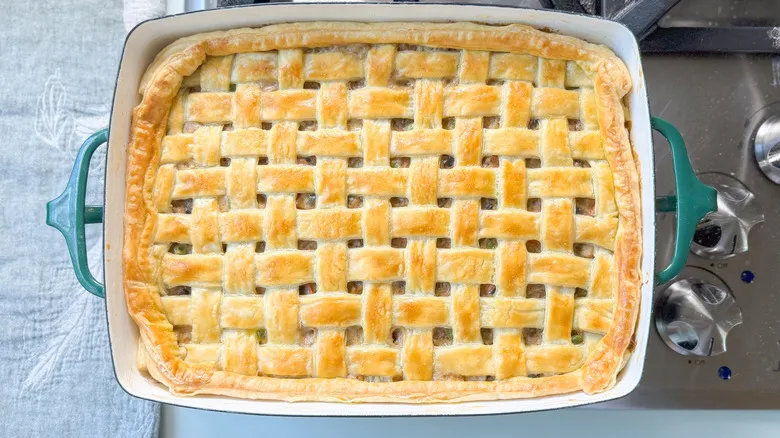
Continue baking for an additional 15 minutes, or until the pastry is a rich golden brown and has puffed up.
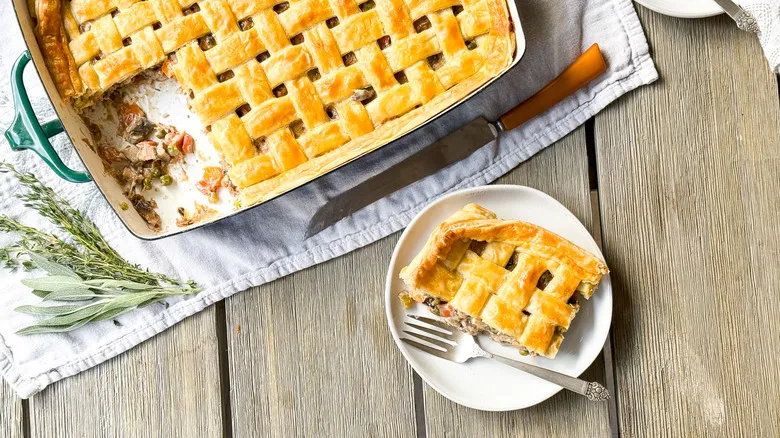
Step 35: Serve the chicken, mushroom, and winter squash pot pie
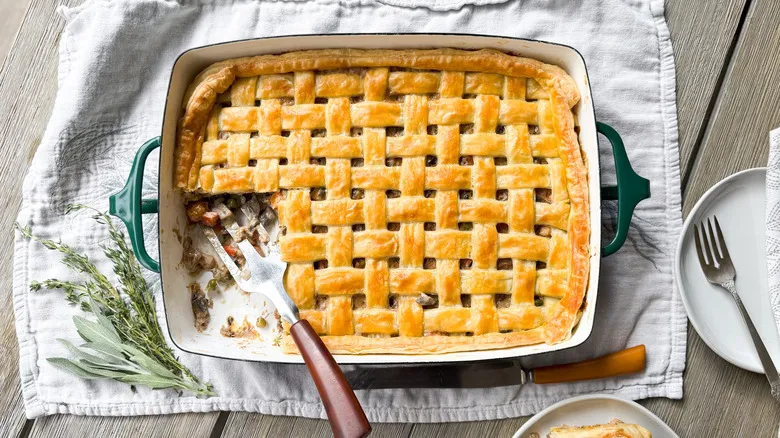
Allow to cool for 15 minutes, then serve the chicken, mushroom, and winter squash pot pie, and savor the flavors.
What are some tips for working with puff pastry?
Puff pastry can be quite daunting for beginner bakers. Fortunately, for home cooks, it's one of the few essential baking items that is often better bought than made from scratch. As a former pastry chef, Kinnaird relishes the challenge of crafting this dough by hand, but acknowledges that having a package of frozen puff pastry readily available makes it simple to create stunning baked goods without much effort.
When it comes to using frozen dough, the typical advice is to thaw the puff pastry sheets in the refrigerator overnight. However, Kinnaird has also found success with a quick 30–40 minute thaw on the countertop when time is short. The important thing is to ensure the dough is thawed enough to unfold without cracking, yet still cool enough to prevent the butter from melting between the layers. Using a chilled rolling pin can yield even better results.
Additionally, it's best to avoid rolling over the edges of the dough. The light, flaky layers of puff pastry are formed by steam that builds up between the flour and fat. Sealing the edges of the dough can trap steam, leading to a soggy interior. When blind baking unfilled puff pastry, be sure to prick the dough with a fork to let excess steam escape. If you're making a pot pie and want a solid top crust, create slits or decorative cut-outs to allow steam to vent.
How can I prepare this pot pie in advance?
Pot pies are best enjoyed right after they come out of the oven, but most of this recipe can be prepared ahead of time, making the final steps easy on the day you plan to serve it. This makes it an ideal dish for holiday gatherings or dinner parties. You can cook, cool, and store the entire filling in an airtight container in the refrigerator for up to two days before baking. Once you transfer the filling to the prepared pan, it’s ready to be topped with the puff pastry crust and brushed with egg wash.
You can cover the unbaked pie with plastic wrap and refrigerate it for an extra day before baking, or you can freeze the whole pie for up to three months. If you’re baking a pot pie that has been frozen, be sure to let it thaw completely in the refrigerator for 12 to 24 hours before baking. The thawed pot pie, which will still be cool, may need an additional 15 minutes of baking time. If the crust begins to brown too much, simply place a sheet of foil over the top to prevent it from over-baking.
Recommended
Apple-Cinnamon Slow Cooker Steel-Cut Oatmeal Recipe

Shrimp Salad Toast Skagen Recipe
Over-The-Top BLT Pasta Salad Recipe
Classic Comforting Matzo Ball Soup Recipe
Next up