
1. Use a high-gluten flour
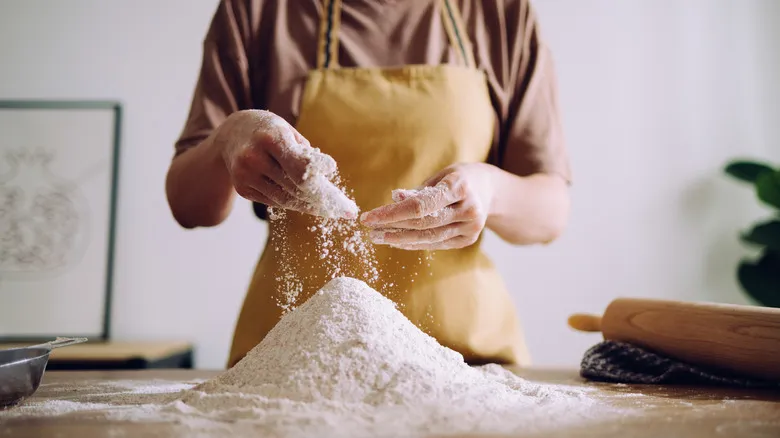
One of the most common mistakes in pizza-making is using the wrong type of flour, which can result in a crust that fails to meet New York style standards. "One of the key characteristics of New York Style is that the crust doesn't bend," explains Michael McCoy, founder of Prepa Pizza. This allows you to "fold it and take it with you without needing a plate." Since the ability to eat on the go is a hallmark of this style, choosing the right flour is essential.
High-gluten flour is the ideal choice, as it provides significant structural integrity due to its higher protein content. This results in a stretchy dough that yields the classic chewy texture and a crispy, crunchy bottom. "The outcome is a larger pizza with a sturdier crust that can withstand reheating," notes Blaine Parker.
General Mills All Trumps flour is a great option for high-gluten flour, though it can be challenging to find since it's primarily used by professionals. It can be purchased online in 50-pound bags, making it a worthwhile investment if you're serious about achieving a great crust. If you're uncertain, you might opt for a 25-pound bag, but it may not offer the best value. If you choose to use regular flour, ensure it can provide the necessary structure to stretch the dough thinly, as per New York style pizza guidelines. To enhance the flour's gluten content, you can add vital wheat gluten. Simply check the gluten content of your flour against the recipe requirements and adjust accordingly.
2. Add less water
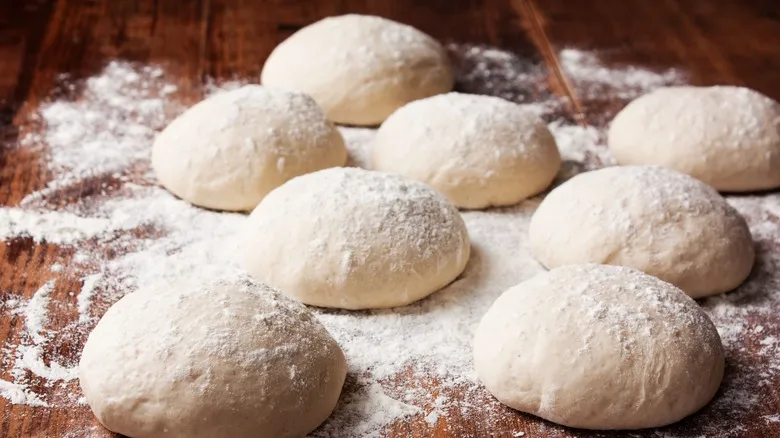
One of the key secrets behind your favorite NYC pizza joints lies in moisture, or "hydration," as experts refer to it. The amount of water used in pizza crusts varies to produce different textures. For example, Sicilian and Chicago deep-dish pizzas typically have lower hydration levels, ranging from 50-57%. In contrast, New York style pizzas generally use about 60% hydration, similar to many traditional pizzas (like those you order for delivery). Doughs with higher hydration, around 70%, result in soft, pliable crusts that char easily, making them ideal for wood-fired ovens.
According to Michael McCoy, "The lower hydration contributes to a crispy yet chewy base," emphasizing the importance of getting it just right. This ensures a sturdier crust that won’t sag. However, Mark Bello notes, "While there is a scientific aspect to dough, there’s also an element of intuition. We adjust the hydration based on environmental factors like temperature, humidity, and altitude. The dough we prepare with our students in our NYC classroom during the hot, humid days of August behaves differently than in the cold, dry days of February." For this reason, he often says that New York style pizzas are around 60(ish)%, allowing for the chef's instinct to play a role.
To manage hydration effectively, in addition to incorporating the standard olive oil in New York style crusts, chefs can use flour dustings while kneading the dough to achieve the right consistency. "Aim for a slightly tacky texture that isn’t sticky and springs back like a Tempur-Pedic mattress when pressed," Bello advises. This hands-on method enables chefs to create the perfect crust, regardless of whether they are in a desert, a tropical climate, or at high altitudes.
3. Ferment your dough for a long time
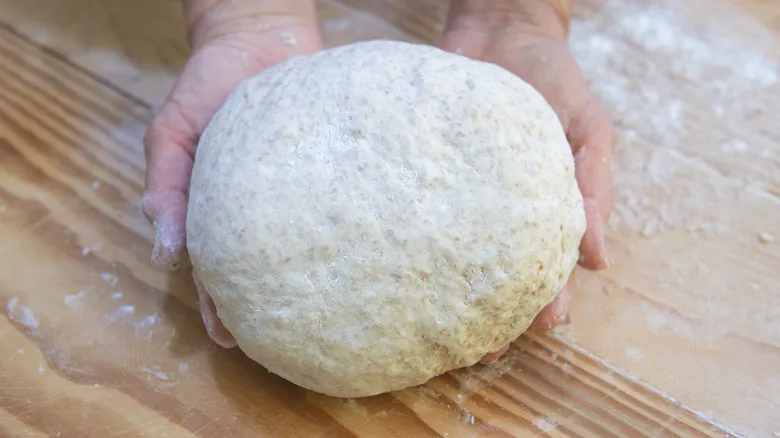
While there's a common belief that the distinctive taste of New York-style pizza is due to the city's tap water, that's a misconception. The true source of this essential flavor lies in the dough preparation, particularly the fermentation process employed by the chef. If the fermentation is rushed, the signature taste won't develop, which is a warning sign for any pizzeria.
"One of the biggest errors that many restaurants make is using dough that has been prepared the same day or the day before, which doesn't allow for adequate fermentation," explains Michael McCoy. "As a result, the dough ends up being quite bland and uninteresting." A proper fermentation period of at least three days is crucial for achieving the right texture and flavor in the dough. This duration allows the yeast to break down the ingredients, resulting in that tangy, slightly sour taste that defines a great New York-style pizza. Additionally, insufficient fermentation means "the flour hasn't been adequately broken down by the yeast, forcing your body to do the work." This is particularly important for those with gluten sensitivities, as sourdough is generally easier to digest than regular bread.
For novice pizza makers, impatience is a frequent pitfall. "The outcome is often a disappointing pizza," says Blaine Parker. "The key is to be patient. Long, cold fermentation is essential when making pizza dough, especially at home." So, don’t rush the process; ironically, that’s not the authentic New York approach to pizza.
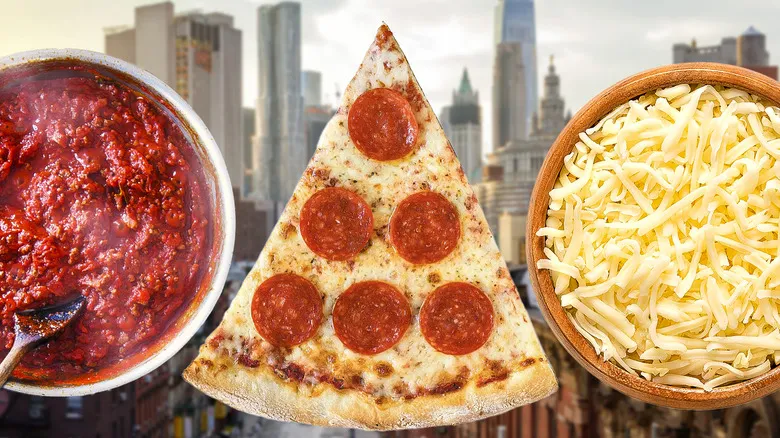
4. Opt for a simple tomato sauce
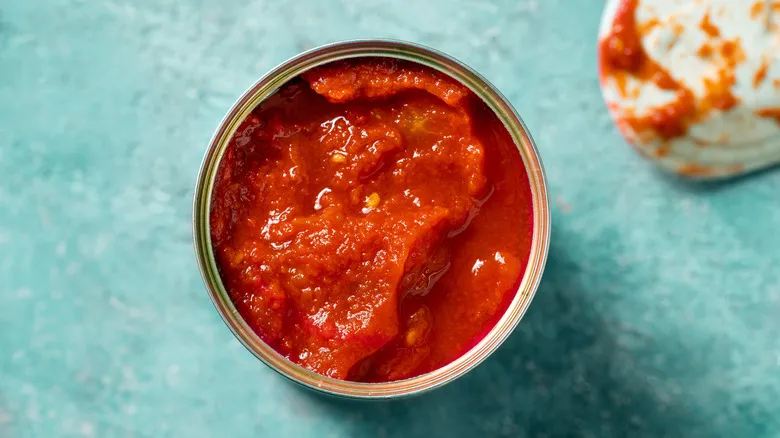
There are countless opinions on what makes a great sauce. Renowned chefs insist that the key to an excellent pizza sauce is that it should be raw, end of story. This involves using a can of crushed or puréed tomatoes, or manually crushing canned, peeled whole tomatoes, then seasoning and applying the mixture to your pizza without any heat. This principle holds true for New York-style pizza just as it does for any other variety.
The good news is that creating a fantastic sauce for your New York-style pizza is incredibly straightforward. "Many store-bought pizza sauces are loaded with inferior ingredients, sugars, and syrups, while higher-quality options can be significantly more expensive than this simple yet amazing sauce," says Mark Bello. The ideal recipe includes one 28-ounce can of high-quality puréed tomatoes (or crushed tomatoes for a chunkier texture), 1 teaspoon of salt (optional), 1 teaspoon of sugar (optional), 1 teaspoon of garlic powder, and 1 tablespoon of dried oregano. "You can prepare this sauce right in the can. Just remember to transfer any leftovers to a nonreactive container after your pizza gathering for refrigeration or freezing later."
The focus of the pizza sauce should be on that rich, flavorful, low-water tomato essence. Most people achieve this with plum tomatoes, with San Marzano being the top choice. However, more budget-friendly puréed tomatoes will work just as well. Bello also advises checking the can for added salt; if it contains salt, you can skip adding more, as most pizza toppings are already salty.
5. Go light on sauce

While sauce is essential, it's important not to overdo it. New York pizza is designed to be portable, so keeping it light is key. This is why most pizzerias use a modest amount of sauce. A 28-ounce can of tomato purée can adequately cover six large pizzas, typically around 18 inches, perfect for creating substantial, meal-sized slices. Based on this, you should aim for approximately 5 ounces of sauce per pizza.
When applying the sauce, strive for a thin, even coating. If you prefer a more instinctive method, just ensure that the sauce is hidden beneath the cheese, as Michael McCoy suggests. With a reasonable amount of mozzarella (enough to avoid making the pizza too heavy or causing the cheese to slide off), the sauce should remain out of sight.
6. Use low-moisture mozzarella

Congratulations, you've reached the most crucial part of this discussion, in my opinion: the cheese. After all, isn't cheese the heart of the matter? Just like with any other ingredient, it's essential to choose the right one.
"For a classic NYC slice, we prefer whole-milk, low-moisture shredded mozzarella," says Mark Bello. "Some pizza chefs opt for part-skim or a mix of whole-milk and part-skim," he adds, but part-skim tends to brown more quickly than whole-milk. This can lead to "skim cheese browning and toughening before the crust has a chance to bake properly." Since you're using a home oven, which doesn't reach the same temperatures as a commercial kitchen, it's crucial to allow your pizza enough time to cook. Therefore, whole-milk mozzarella is the best choice.
For those mindful of their calorie intake, there's no need for concern. "Whole-milk, low-moisture mozzarella has about 80 calories per ounce, while part-skim is around 70 calories per ounce. Whole-milk mozzarella melts more effectively, allowing you to use less for adequate coverage, which balances out the calorie count." Lastly, while low-moisture mozzarella may sound like a gourmet item, it simply refers to the mozzarella that comes wrapped in plastic, similar to regular cheese, rather than being stored in water. Although fresh mozzarella is tasty, its high moisture content isn't suitable for New York-style pizza, though it is commonly used in Neapolitan pizza.
7. Don't use pre-shredded cheese
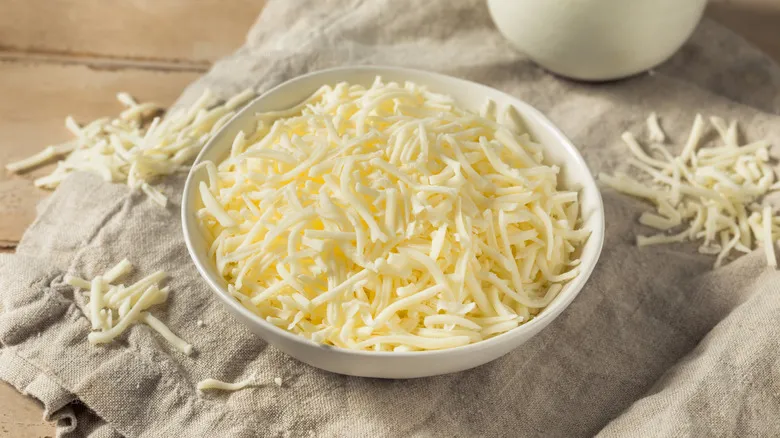
Here’s a general tip for making pizza with mozzarella: Avoid using pre-shredded cheese. According to Mark Bello, it often contains starch, known as "anti-caking agents," which keeps the cheese from clumping together. While this may benefit grocery store owners by extending shelf life, it can hinder the cheese's melting quality. Bello adds, "It doesn't enhance flavor or texture."
In short, you should grate the cheese yourself. Many people shy away from this because even dry mozzarella can be tricky to grate due to its softness compared to a firmer cheese like cheddar. To make it easier, Bello suggests placing the block of cheese in the freezer for 15 minutes to firm it up before shredding. He also advises using a good grater, as a sharp tool is safer than a dull one. If you're looking for a recommendation, he suggests the Microplane grater.
Additionally, be careful not to overload your pizza with cheese. While you can certainly pile on the cheese for a New York slice, the key is to keep it portable. The hallmark of this style of pizza is that you can easily carry it without the risk of making a mess, so avoid going overboard.
8. Experiment with toppings
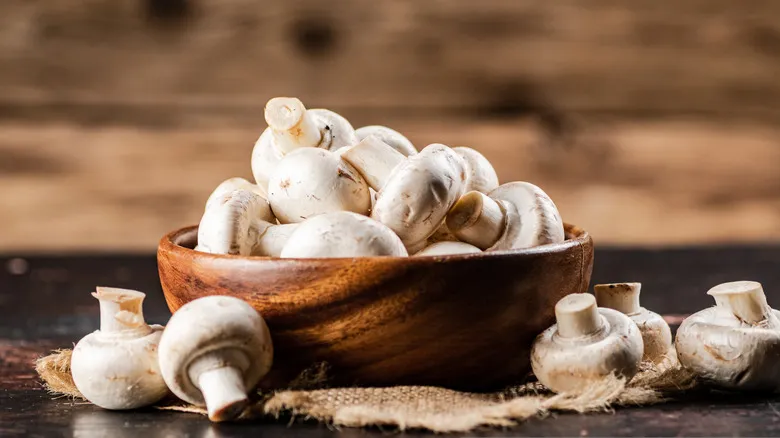
While many envision a New York slice as simply cheese and pepperoni, there’s plenty of room for creative toppings. However, be cautious not to overload your pizza, as this can affect its portability. Additionally, some toppings, like pepperoni and anchovies, can be quite salty, so it’s best to use them sparingly.
When it comes to choosing toppings, pizza makers have their preferences. Mark Bello shares, "I’m a purist and believe that the classic cheese slice is the ultimate test of any great pizzeria. Beyond that, I lean towards mushrooms and/or sausage." He also emphasizes the importance of moderation, stating, "Using too many different flavors can overwhelm your palate and cause them to clash." So, how can home chefs experiment with toppings? "The checkboxes on the front of a classic pizza box provide a solid list of common options," he suggests. These typically include peppers, onions, anchovies, meatballs, and, of course, mushrooms and sausage.
Bello notes, "Just so you know, pepperoni is the most popular topping in the United States." At Pizza School, they have a fondness for pepperoni and even appreciate vegan pepperoni, which he claims, "even die-hard meat lovers find quite enjoyable."
9. Cook at a lower heat
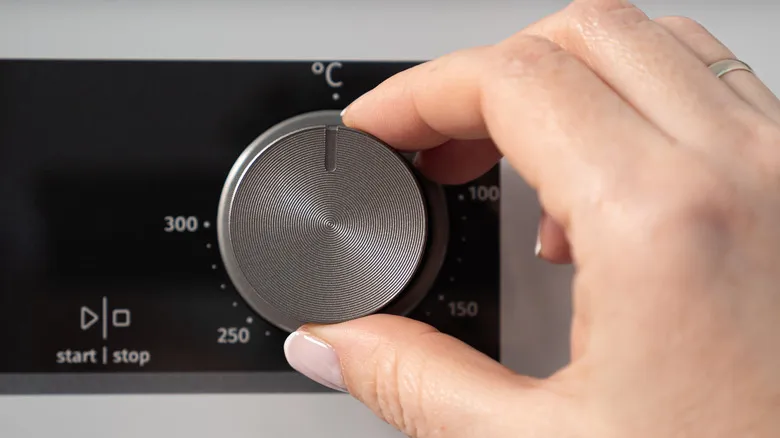
One key characteristic of New York-style pizza is the temperature at which it is baked. Heat plays a vital role in all types of pizza. For example, Blaine Parker notes, "Authentic Neapolitan-style pizza is cooked in a 900-degree wood-fired dome oven, taking about 90 seconds to bake." In contrast, "A New York-style pizza is generally baked in a large gas-fired or electric deck oven at temperatures between 550 and 650 degrees for approximately 6 minutes, give or take. The exact time will depend on the oven, the amount of toppings, and the desired level of doneness."
Most home ovens can reach a maximum of 500 or 550 degrees Fahrenheit, so you may need to adjust your expectations accordingly. Fortunately, New York pizza is quite forgiving and bakes well. Parker adds, "When it comes to professionals, I would say they often underbake the pizza. The browning of the crust adds flavor." However, many pizzerias serve crusts that are too pale, often due to being too busy to allow the necessary cooking time for the pizza to dry out and achieve a crispy bottom, which is essential for that convenient pizza style. Luckily, this is not a problem you are likely to encounter at home.
To enhance your pizza's cooking process, using a pizza stone is highly recommended. The stone retains heat for more even cooking and absorbs moisture from the dough, helping to achieve the perfect crispiness. You can easily find a quality stone for grilling or baking pizza online.
10. Make the slices larger
Whether we’re discussing classic New York-style pizza or its variations like Brooklyn pizza (spoiler alert: there’s really no significant difference), there’s one essential rule when it comes to slicing: the pieces must be substantial. Given the pizza’s large size, the slices will naturally be long, regardless of how many you decide to cut, due to the larger circumference.
“When it comes to traditional NYC slice pizza, you typically get eight slices from an 18- to 20-inch pizza, or sometimes even larger,” explains Mark Bello, though ultimately, it’s your choice. “To quote the late, great Yogi Berra, ‘You better cut the pizza into four pieces because I’m not hungry enough to eat six.’” For clean, even slices, use a sharp pizza cutter. And as I recently learned, a pair of sharp kitchen shears can help you tackle any areas you might have missed with the cutter.
If you can’t make a pizza that size at home, don’t worry: there’s a trick. You can carve out one large wedge from the center by starting at one edge and cutting at an angle all the way to the opposite side, avoiding the crust. Repeat this at another point on the crust to create a long triangle. Save the smaller pieces for later... or for the kids.
11. Fold away! If you want to

This isn't so much a tip on how to make pizza as it is on how to enjoy it, but let's not split hairs. The real question is: to fold or not to fold? Blaine Parker winces at the thought: "Wow. You really want to spark a debate, don’t you? I’ve been known to fold my slices. My wife, however, thinks folding is a crime against pizza. The only guideline here is that there are no guidelines. Do what brings you joy."
In contrast, Michael McCoy takes a more definitive position. "While it’s your pizza and you can do as you please, the tradition of the New York slice is that it’s meant for those on the move. Folding ensures you don’t lose any cheese, sauce, or toppings along the way." In his view, if you’re on the go, folding is the way to go.
When making pizza at home, you’re probably not rushing out the door with your slice, but who knows—you might be an ambitious chef. If that’s the case, consider using a box of wax paper sheets to keep things tidy. And if you prefer to eat your pizza like a sandwich at home, with the crust on the outside and the delicious filling on the inside, go right ahead—no one will stop you!
Recommended

The Convenient Reason Gordon Ramsay Cuts Bell Peppers Upside Down
How Antonia Lofaso's Favorite Childhood Meals Fueled Her Love Of Cooking
Why You Shouldn't Use Soap To Wash Your Molcajete
What To Keep In Mind When Pairing Sauce With Fresh Pasta Vs Dried
Next up