
Gather the dirt patch Halloween brownies ingredients
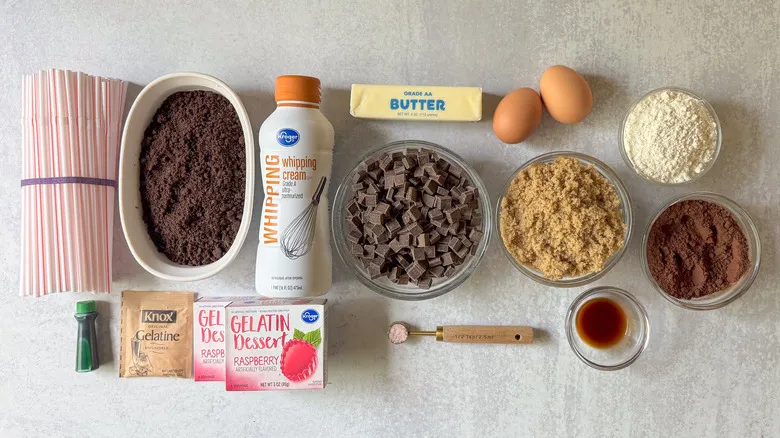
To create the gelatin cream worms for this recipe, you'll require two packets of raspberry jello, one packet of unflavored gelatin, fresh heavy whipping cream, and a few drops of green food coloring to modify the red into a more lifelike "worm" hue. Since red and green are complementary colors on the color wheel, Kinnaird explains that adding a touch of cool green to the vibrant red jello results in a reddish-brown shade, closely resembling the earthy tone of a worm. For shaping the worms, you'll need approximately 100 flexible straws to hold the gelatin mixture.
For the brownies, gather unsalted butter, sea salt, dark unsweetened cocoa powder, light brown sugar, large eggs, vanilla extract, and all-purpose flour. The ganache icing is prepared using dark chocolate chunks and additional heavy whipping cream. The brownies are topped off with "dirt," which is deliciously represented by chocolate cookie crumbs.
Step 1: Combine the gelatins in a heat-proof container
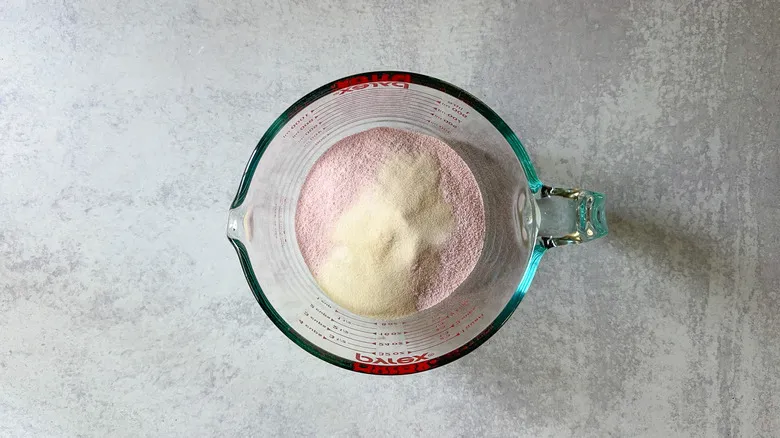
To prepare the gelatin cream worms, mix the raspberry gelatin with the unflavored gelatin in a large, heat-resistant container.
Step 2: Add the boiling water
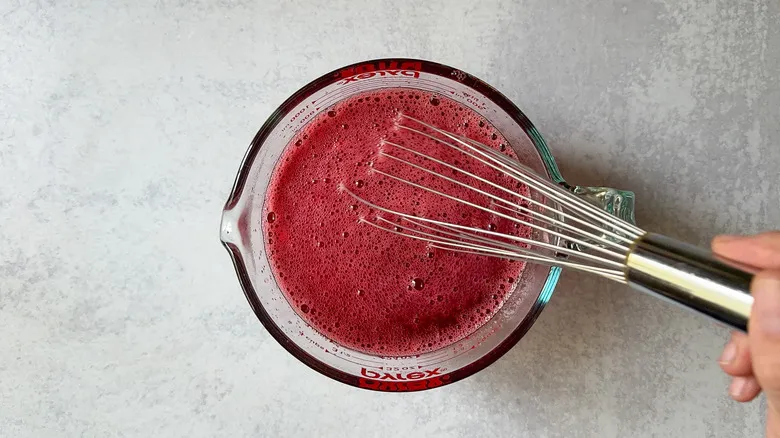
Pour in the boiling water and whisk or stir until fully dissolved. Allow it to cool to a lukewarm temperature (approximately 30 minutes).
Step 3: Straighten out the straws
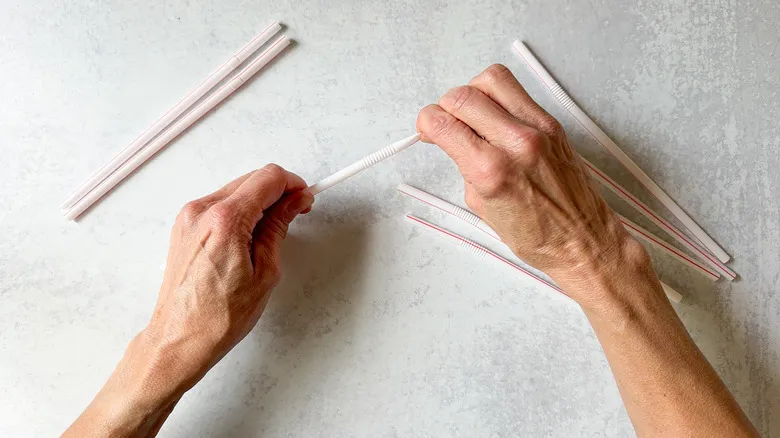
As the gelatin mixture cools, get the straws ready. Stretch and elongate the necks of 100 flexible straws until they are fully straightened.
Step 4: Bundle the straws
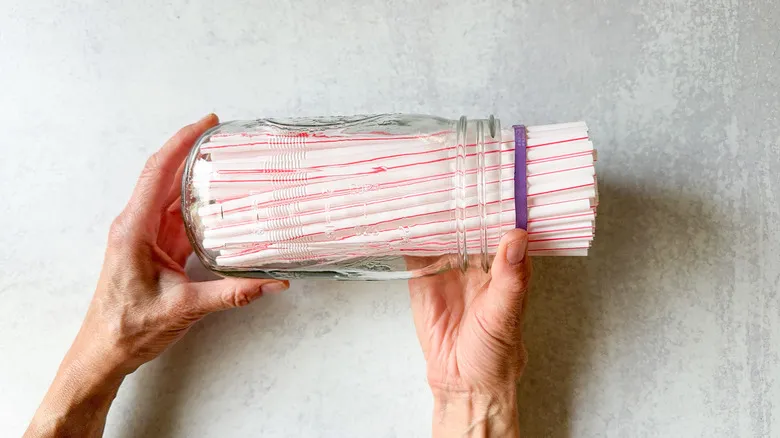
Gather the straws and align the flexible ends downward, then fasten them with a rubber band. Position the bundle inside a tall quart-sized jar or glass that has a flat base and a snug fit.
Step 5: Set the jar in a bowl
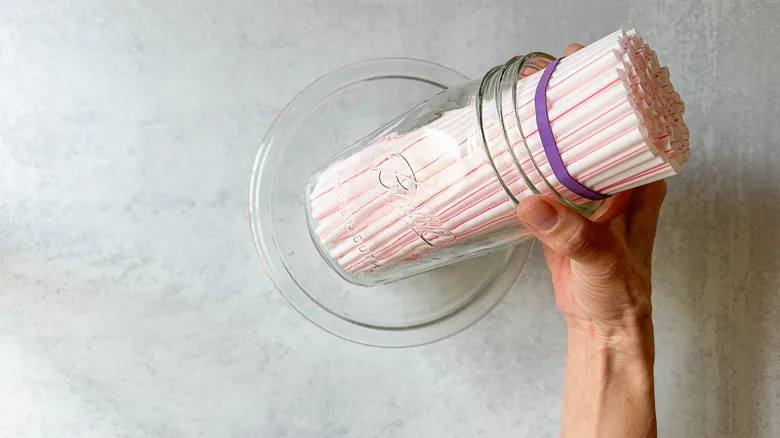
Place the jar in a shallow dish to catch any spills or excess liquid.
Step 6: Add the cream to the cooled gelatin

Incorporate the cream into the lukewarm gelatin mixture and whisk until well blended.
Step 7: Add the green food color
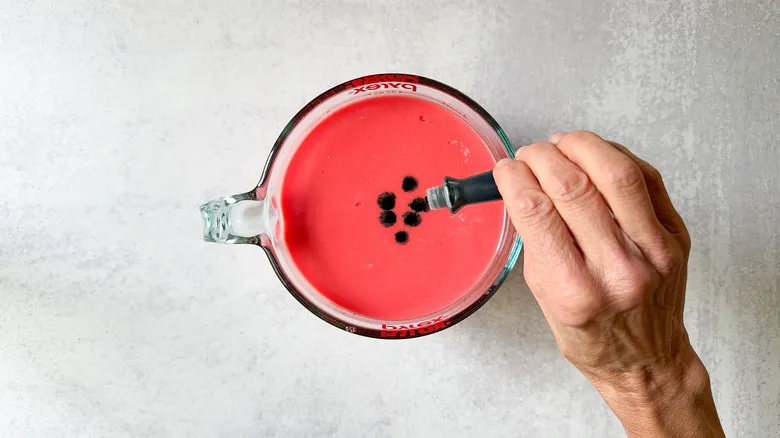
Incorporate the food coloring to create a subdued pink "worm" hue.
Step 8: Fill the straws
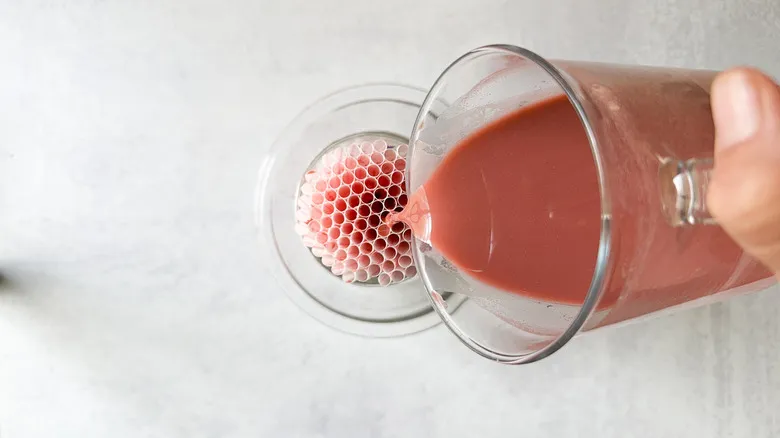
Gently and gradually pour the mixture into the straws, ensuring that each straw is filled evenly.
Step 9: Check the straws and refrigerate
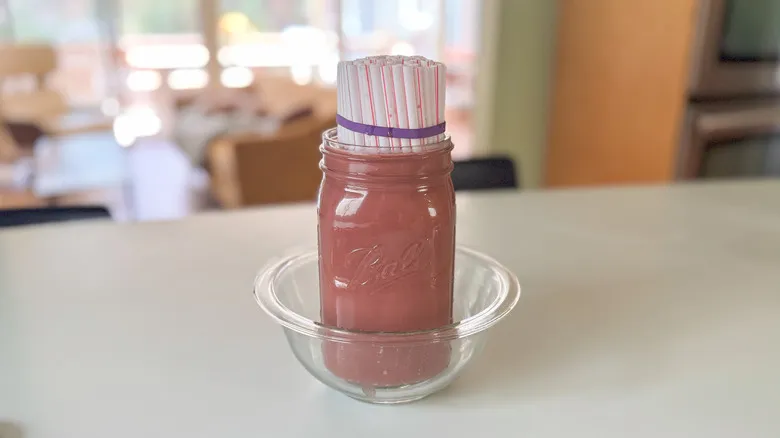
Ensure that the liquid stays below the rim of the jar or glass, and chill the straws for a minimum of 12 hours to achieve the best texture.
Step 10: Preheat the oven to 325 F
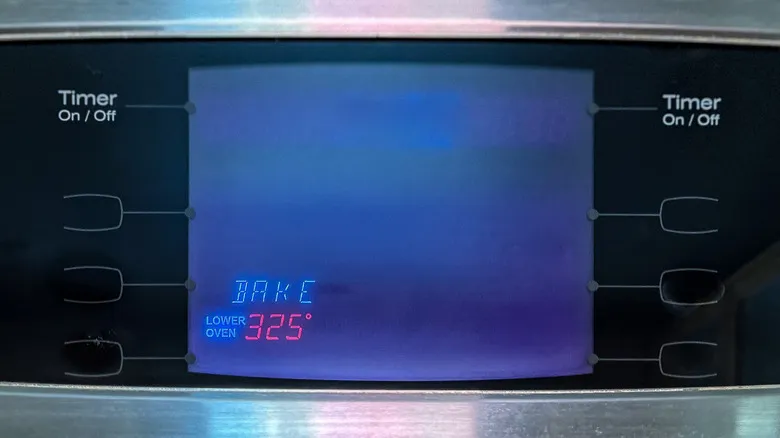
When the worms are almost ready and you're prepared to bake the brownies, preheat the oven to 325°F.
Step 11: Prepare a baking pan for the brownies
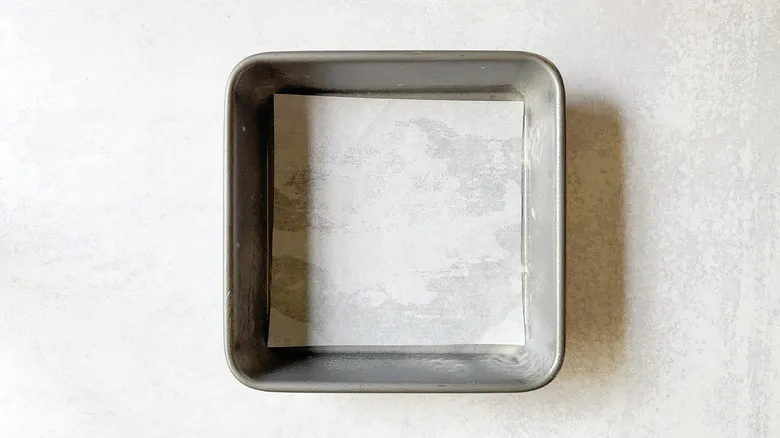
Grease an 8-inch square baking dish and line it with parchment paper.
Step 12: Begin making the brownies
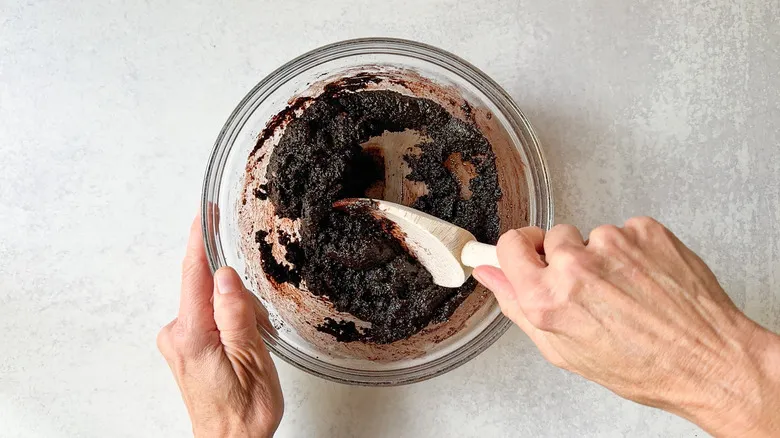
In a spacious mixing bowl, mix together the melted butter, salt, cocoa powder, and brown sugar.
Step 13: Add the vanilla and eggs
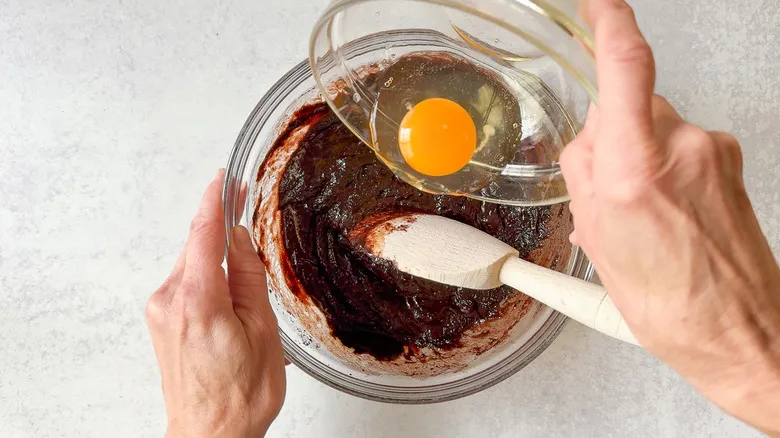
Incorporate the vanilla, followed by the eggs, adding them one at a time and mixing until the mixture is glossy and smooth.
Step 14: Mix in the flour
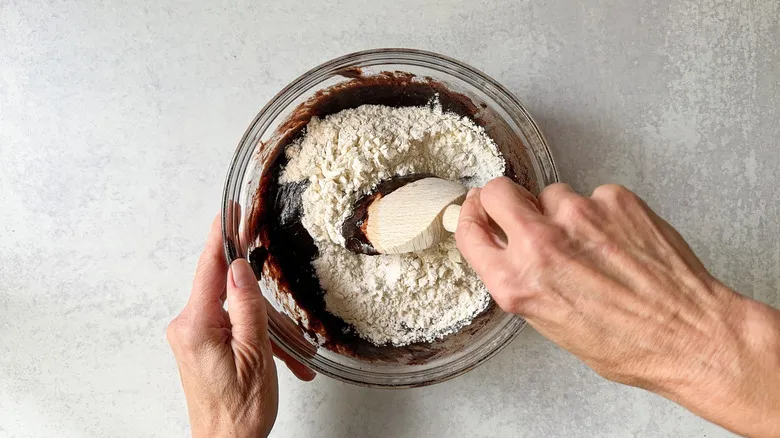
Blend in the flour until the mixture is smooth.
Step 15: Stir in the chocolate chunks
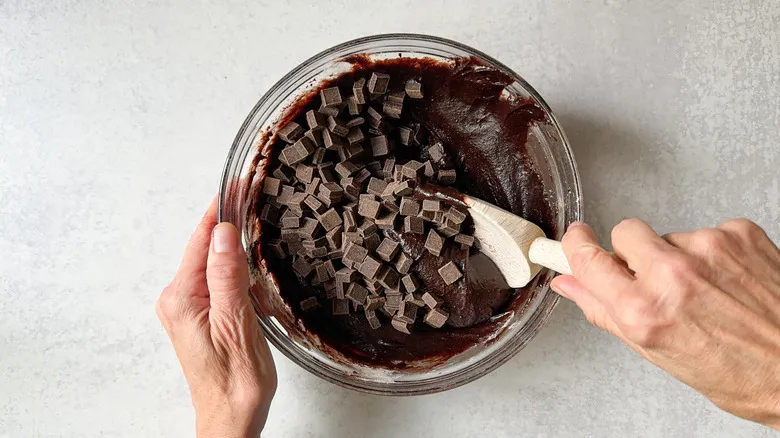
Gently mix in ½ cup of the chocolate chunks.
Step 16: Bake the brownies
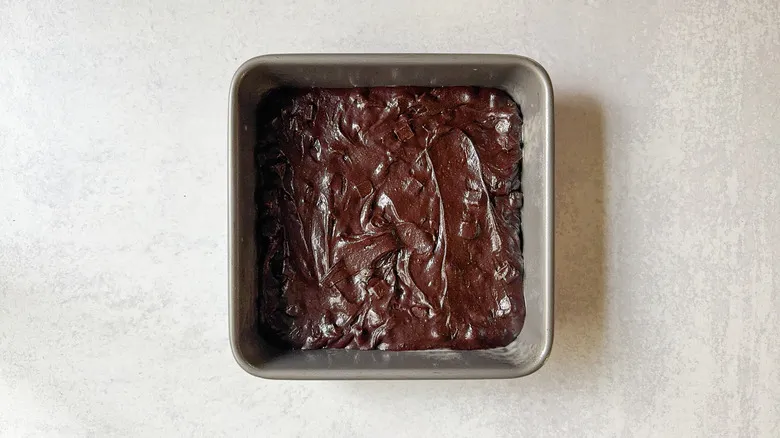
Pour the batter into the prepared pan and bake for 22 to 24 minutes, or until it is just set.
Step 17: Cool the brownies
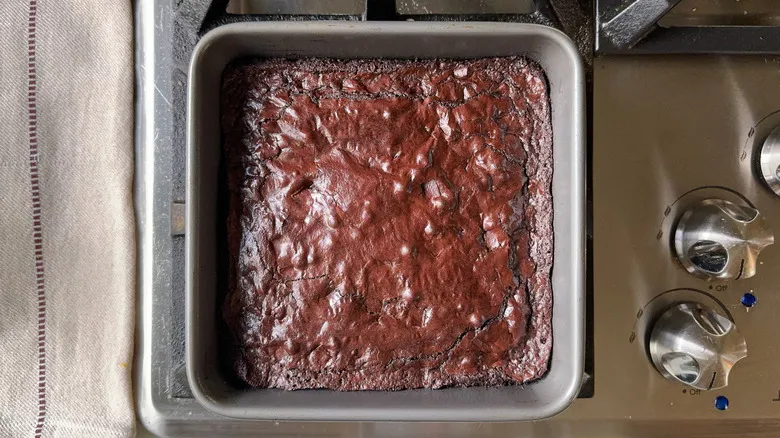
Allow the brownies to cool completely in the pan.
Step 18: Begin the ganache
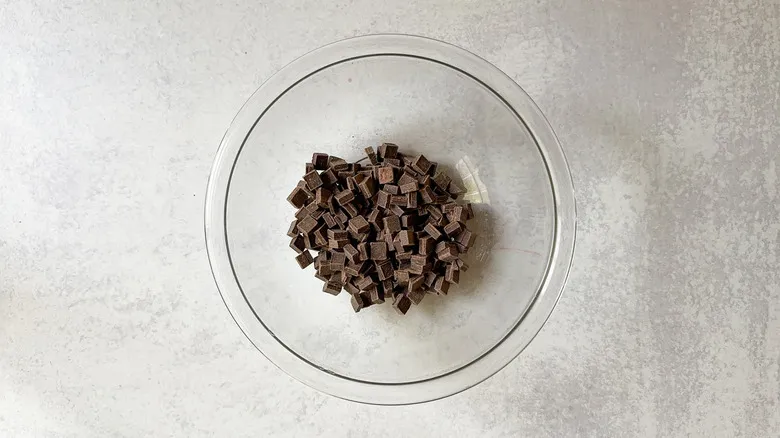
As the brownies cool, begin preparing the ganache by placing the remaining 1 cup of chocolate chunks into a medium heat-resistant bowl.
Step 19: Bring the cream to a boil
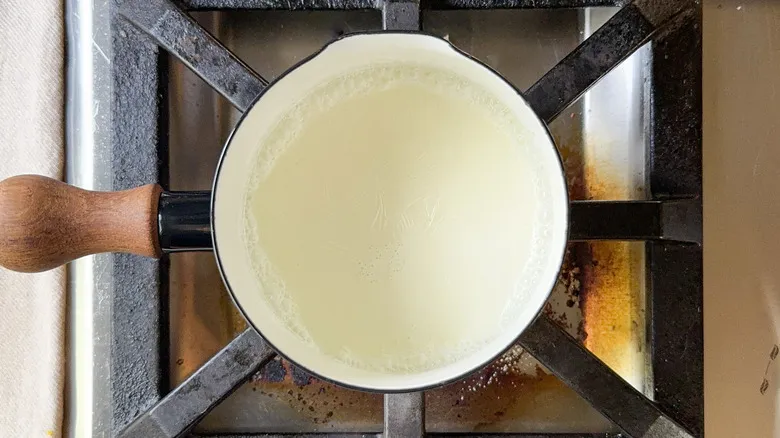
Heat the cream in a small pot over medium heat until it reaches a gentle boil.
Step 20: Pour the cream over the chocolate
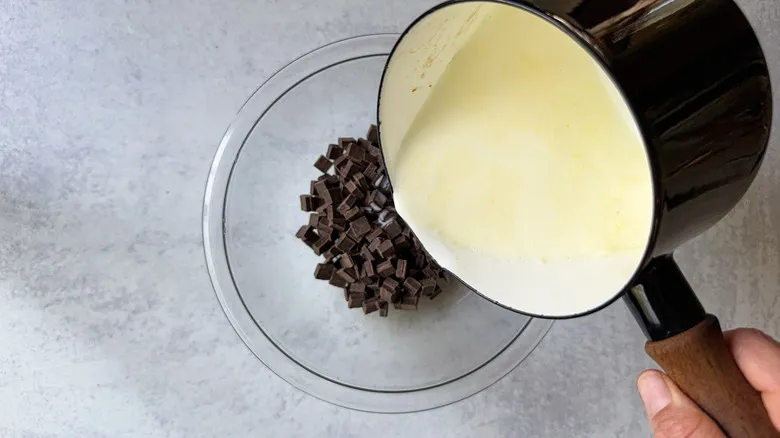
Drizzle the hot cream over the chocolate and stir until it becomes smooth.
Step 21: Peel the parchment off the brownies

Once the brownies have cooled completely, gently take them out of the pan and remove the parchment paper.
Step 22: Place the brownies on a rack
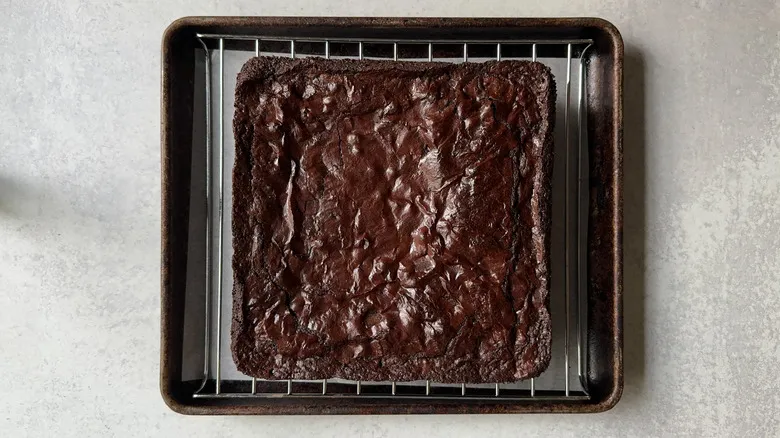
Position the brownies on a rack placed over a baking sheet lined with parchment paper.
Step 23: Pour ganache over the brownies
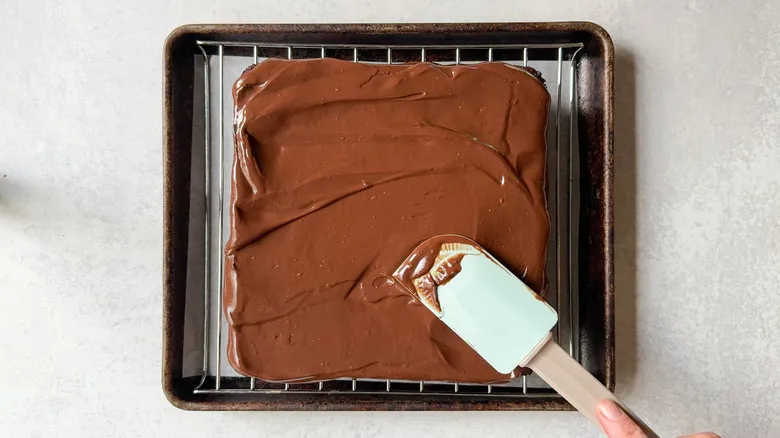
Drizzle the ganache over the brownies, letting it cascade down the edges.
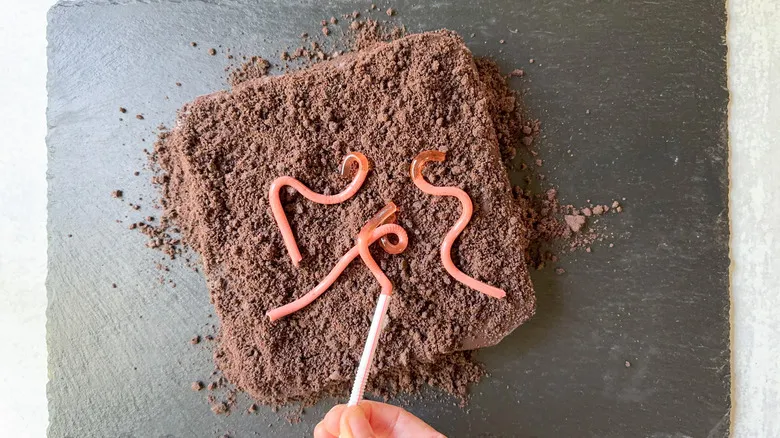
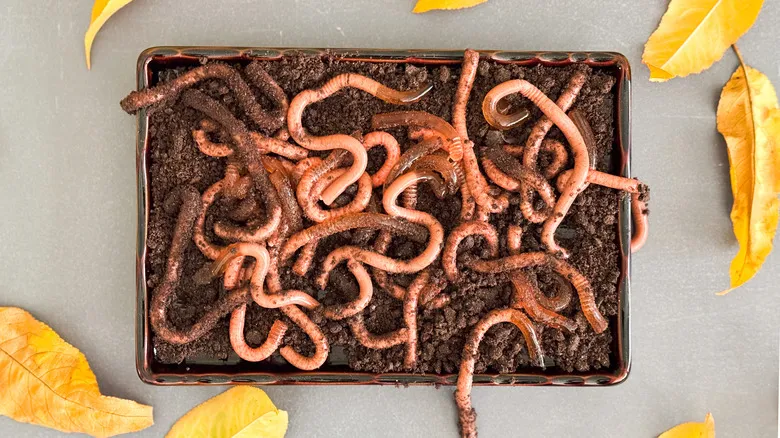
Step 24: Sprinkle cookie crumbs over the ganache
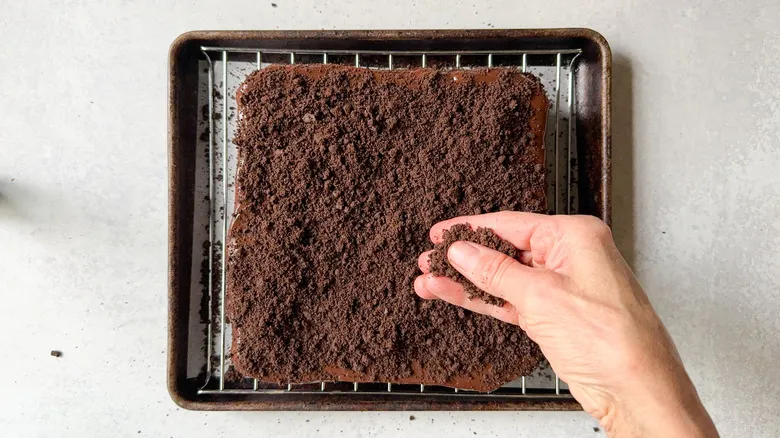
Dust a portion of the cookie crumbs on top of the ganache to mimic "dirt." Set aside the leftover crumbs for coating the worms.
Step 25: Transfer the brownies to a serving platter

Move the coated brownies to a serving dish.
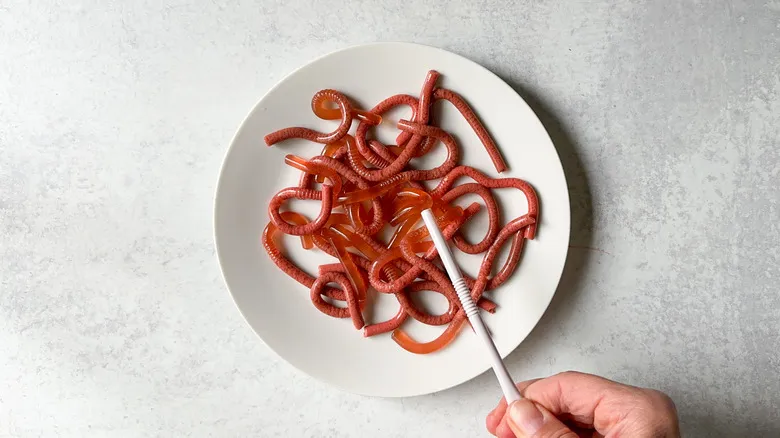
Step 26: Rinse the straws
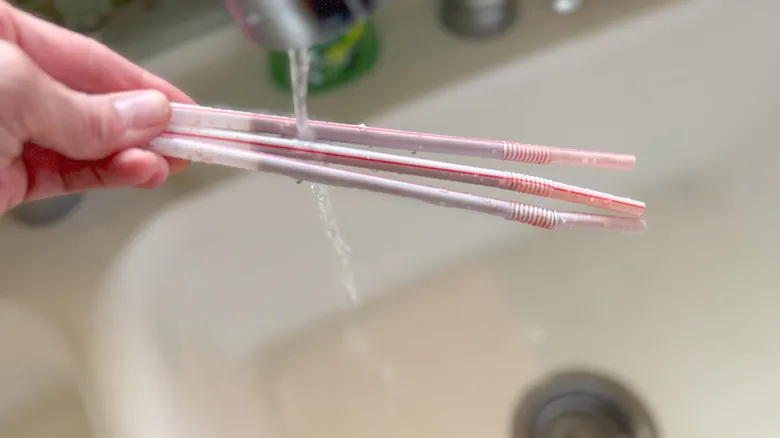
Remove a few of the worm straws from the gelatin mixture. Gently and swiftly rinse the exterior of the straws with hot water, being cautious not to dissolve the gelatin inside.
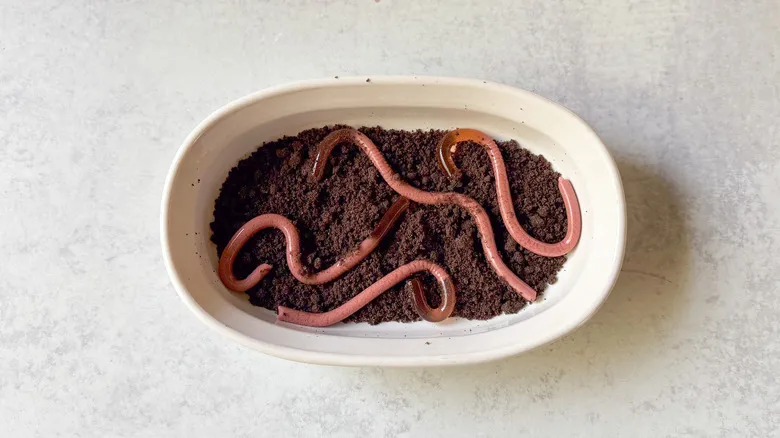
Step 27: Push the worms out of the straws
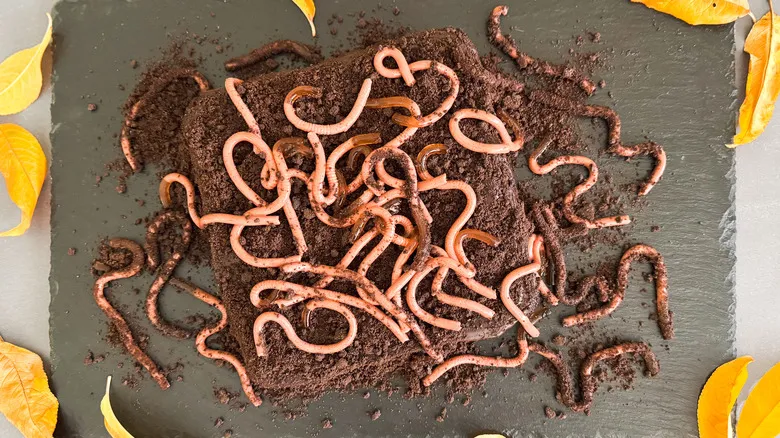
Begin by positioning the end of the straw at the bottom, leaving a space at the top. Carefully squeeze the gelatin out onto a plate, continuing this method until you have a sufficient number of worms to adorn the brownies. Alternatively, you can directly release the worms onto the crumb coating of the brownies if you prefer.
Step 28: Cover some of the worms with cookie crumbs
Coat a few of the worms with the reserved cookie crumbs to give them a "dirt" appearance.
Step 29: Add extra crumbs and more worms to the brownies
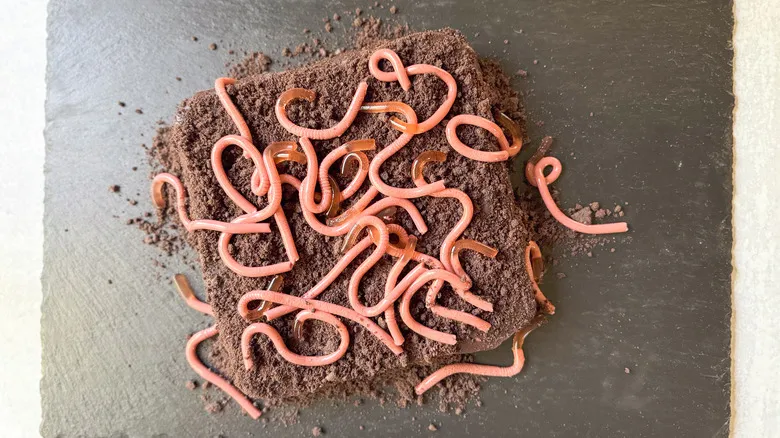
Disperse any leftover crumbs around the platter and add additional worms as needed.
Step 30: Cut the brownies into squares and serve
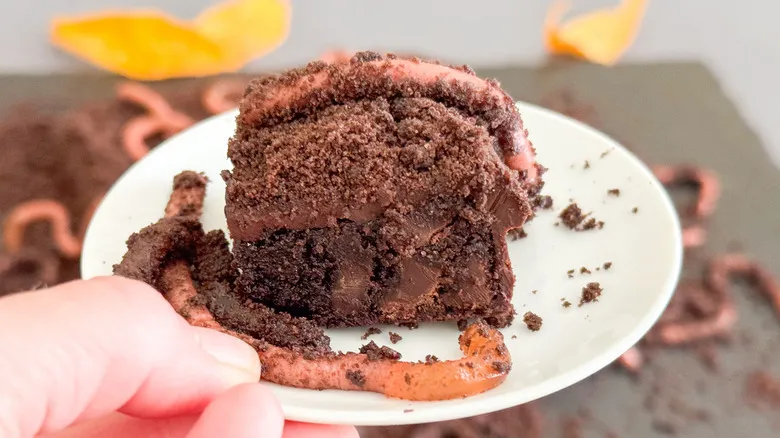
Slice the brownies into squares when it's time to serve.
Can I switch up the flavors of the brownies or gelatin worms?
Kinnaird enjoys the combination of raspberry gelatin worms and dark chocolate brownies, but there are plenty of ways to mix up the flavors in this recipe. Instead of raspberry gelatin, consider using cherry or strawberry to maintain the red hue while transforming the taste into chocolate-covered cherries or dipped strawberries. For a more adventurous and unconventional approach, opt for orange or berry blue worms, which will still complement the chocolate flavor beautifully.
When it comes to the brownies, you can enhance the chocolate taste by incorporating different extracts such as coffee, rum, or almond. Instead of using dark chocolate chunks, feel free to substitute with an equal amount of milk or white chocolate chips. A sprinkle of cinnamon can also introduce a delightful and spicy twist. While Kinnaird chose plain chocolate cookies for her crumbs, you might want to try experimenting with Oreos, fudge-striped cookies, or even peanut butter-filled chocolate cookies for a fun variation on the delicious "dirt."
Can I prepare the brownies and worms in advance, and how do I store leftovers?
This recipe involves several steps that can be prepared ahead of time. To start, the worms can be mixed and shaped up to three days prior to serving, and then unmolded a few hours before they are needed. The brownies can be baked up to two weeks in advance; simply wrap them tightly in multiple layers of plastic wrap and freeze. Alternatively, you can bake them the day before and store them in the refrigerator until you're ready to use them. The ganache and cookie crumbs can also be added to the brownies a day ahead. Just make sure to keep everything in an airtight container to avoid drying out.
If you have extra worms and cookie crumbs, consider creating an additional display to place alongside the brownies. You might even fill a styrofoam cup with cookie crumbs and worms to resemble something you’d find at a bait shop. Regardless of how you choose to present this spooky display, keep in mind that the gelatin worms will only last a couple of days after being unmolded from the straws. Be sure to keep everything wrapped in plastic and refrigerated to maintain freshness.
Recommended
Salted Caramel-Stuffed White Chocolate Chip Cookies Recipe
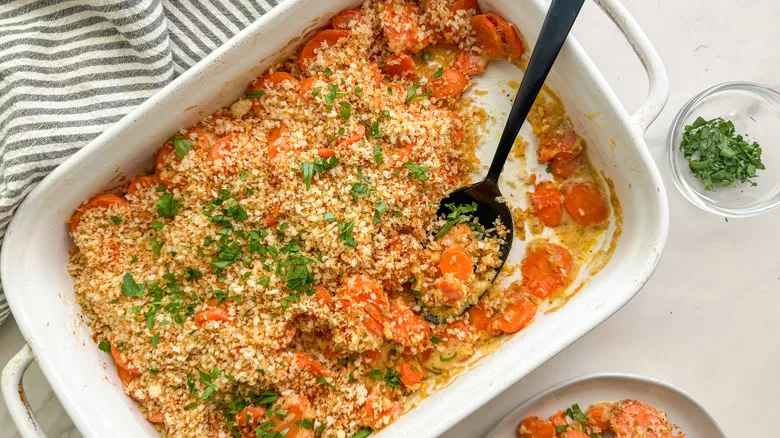
Creamy Carrot Casserole Recipe
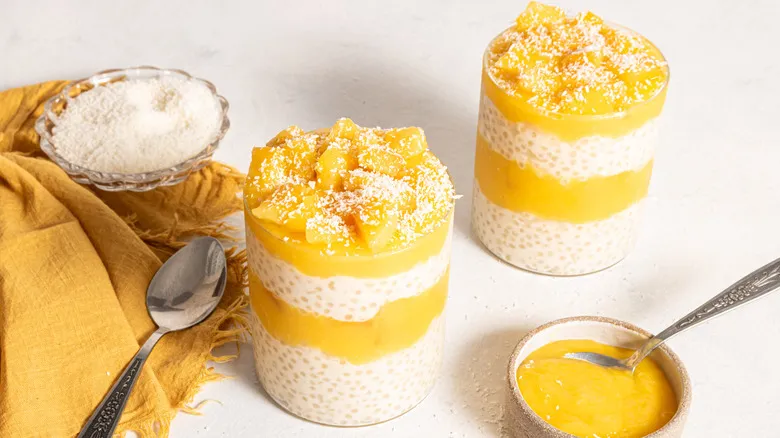
Mango Sago (Mango Coconut Tapioca Pudding) Recipe
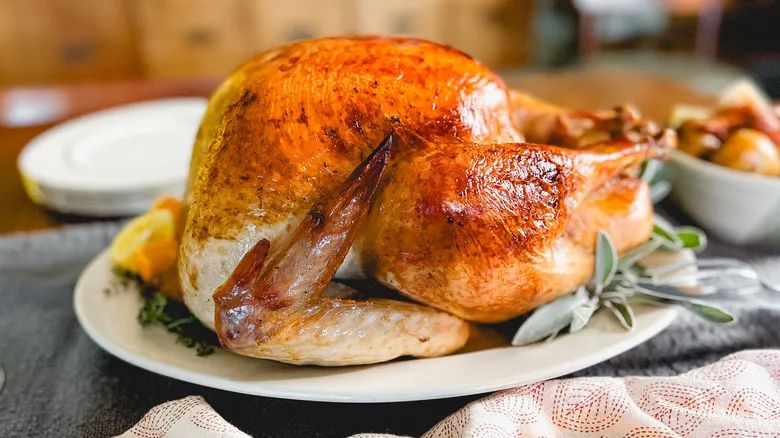
Basic Roasted Turkey Recipe
Next up