
Gather the ingredients to make Homeroom's macaroni and cheese
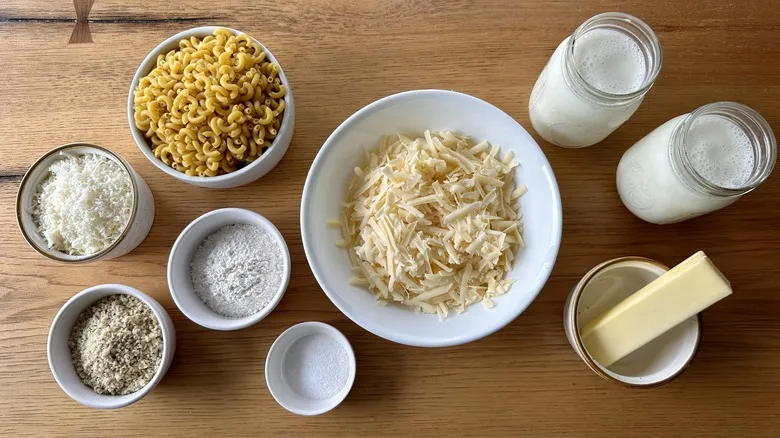
Homeroom's macaroni and cheese features elbow macaroni, a common choice in many recipes. It incorporates standard ingredients such as milk, butter, flour, salt, and cheddar, while also adding Pecorino Romano cheese for an extra kick of flavor. If you're preparing the baked variation, don't forget to include panko breadcrumbs for the topping.
Step 1: Warm the milk
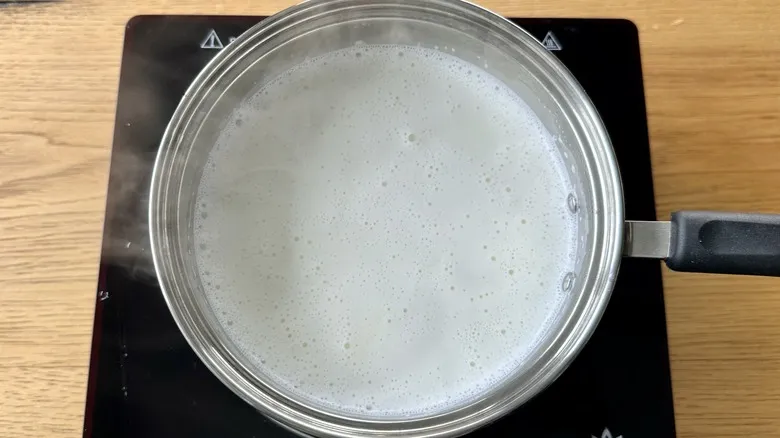
Warm the milk in a medium saucepan over medium-high heat until it begins to simmer. Remove from heat and set aside.
Step 2: Melt the butter
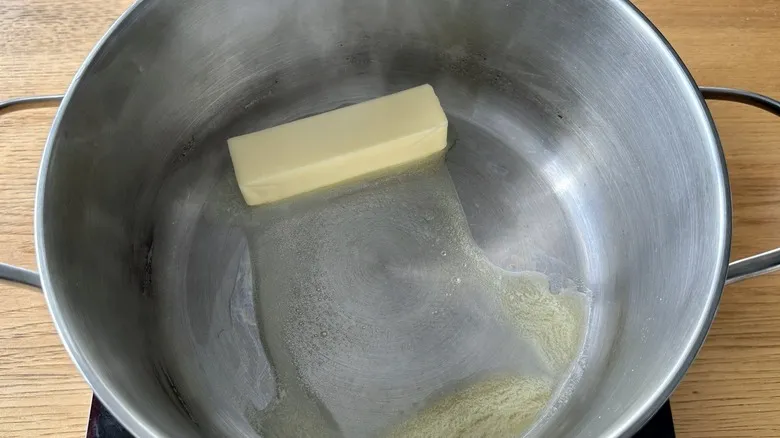
In a spacious saucepan with a thick base, melt the butter over medium heat.
Step 3: Stir in the flour to make a roux
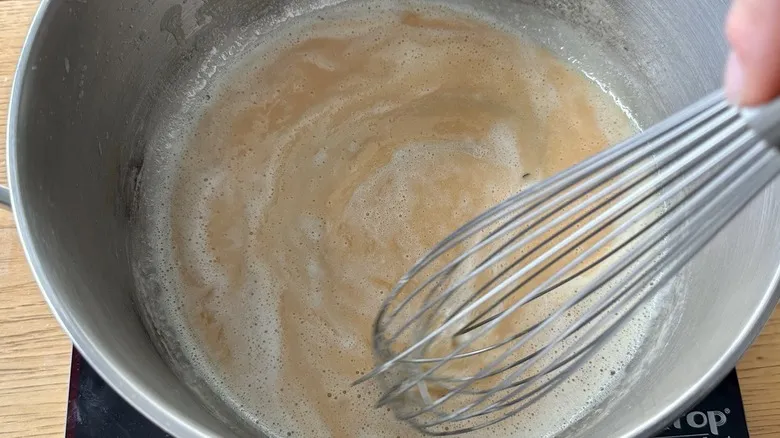
Incorporate the flour and continuously whisk until the mixture achieves a light brown hue, approximately 3 minutes. Take it off the heat.
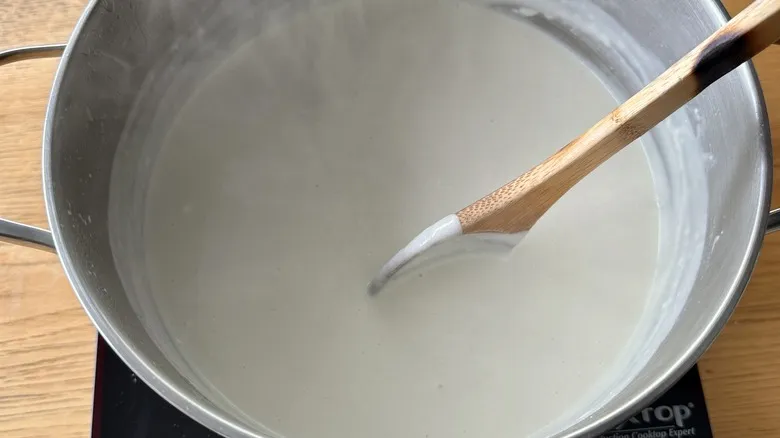
Step 4: Add the milk to the roux
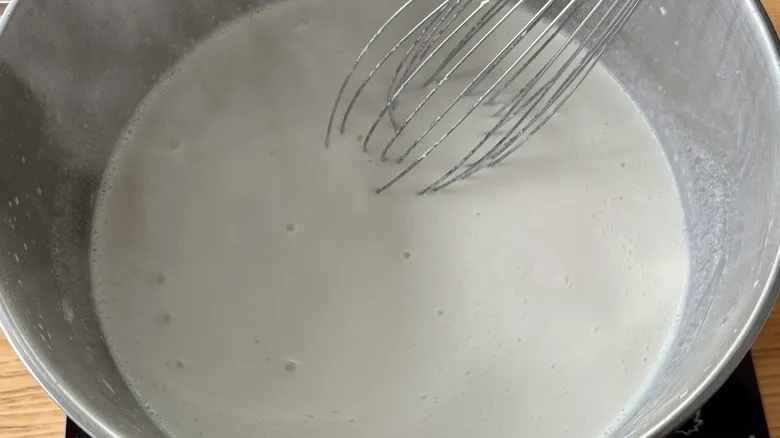
As you whisk continuously, gradually incorporate the hot milk into the flour mixture until it is fully blended and smooth. Initially, the mixture will become quite thick upon adding the milk, but it will then loosen up.
Step 5: Simmer the sauce
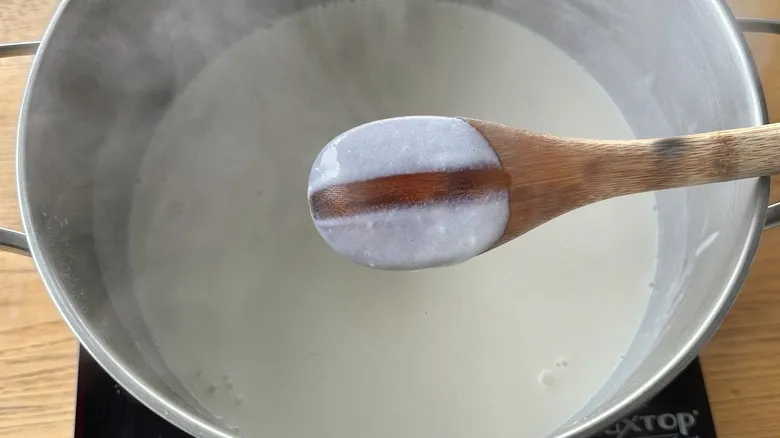
Place the saucepan back on medium-high heat and, while continuously whisking, cook until the sauce thickens and coats the back of a spoon, which should take around 2 to 3 minutes.
Step 6: Season the sauce with salt
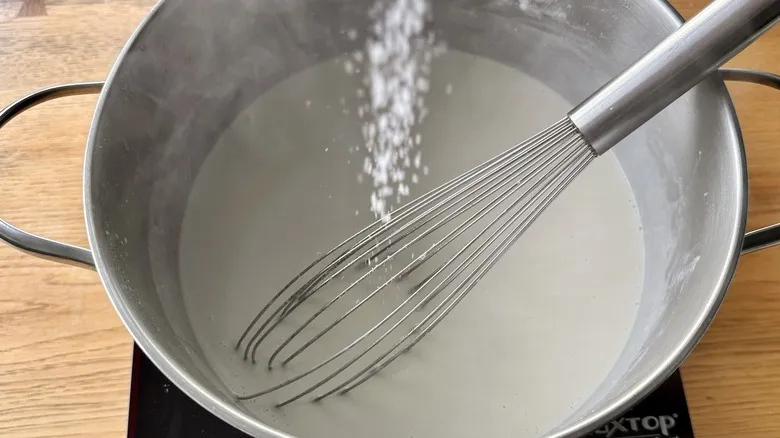
Mix in 1 tablespoon of salt, taste, and add more salt if needed. Take off the heat and set it aside.
Step 7: Cook the macaroni
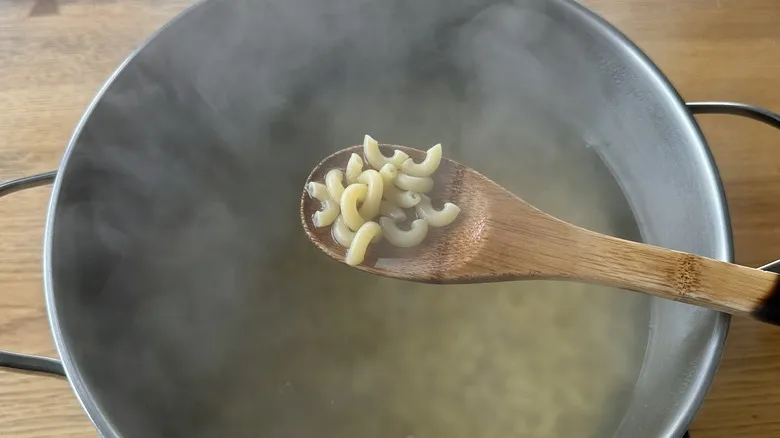
Fill a large pot with water, adding a generous amount of salt, and bring it to a rolling boil over high heat. Once boiling, add the pasta and cook it until it's nearly al dente, just shy of being undercooked.
Step 8: Drain the macaroni

Drain the pasta and rinse it with cold water; then set it aside.
Step 9: Add the cheeses to the white sauce
Put the reserved saucepan of béchamel on medium heat and mix in both cheeses until they are fully melted and smooth.
Step 10: Stir in the macaroni
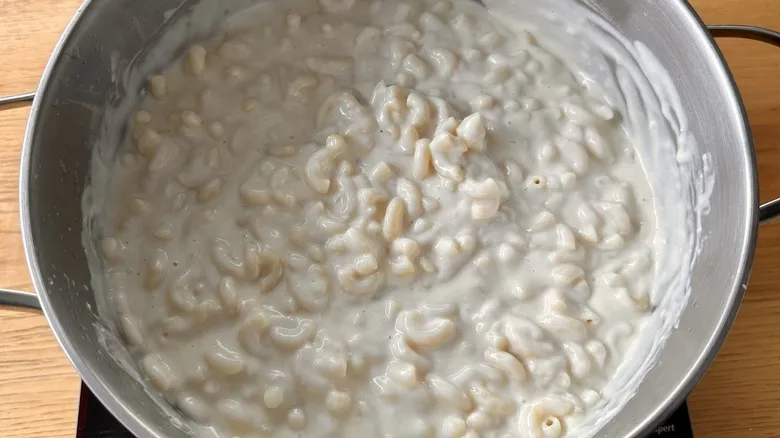
Incorporate the pasta and keep cooking, stirring occasionally, until it is heated thoroughly and steaming, which should take around 2 to 4 minutes.
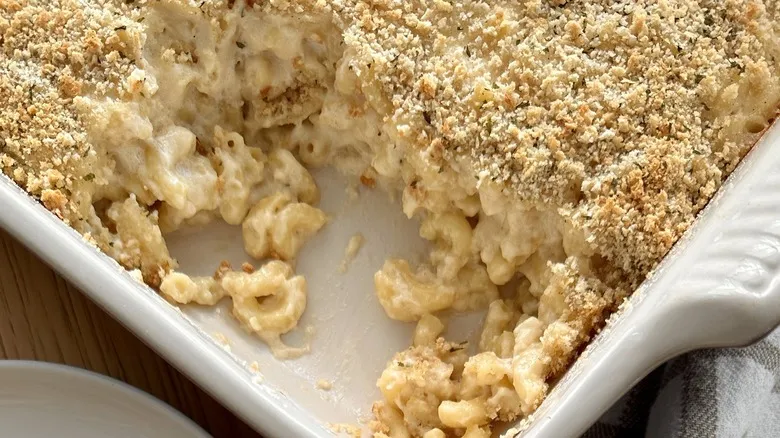
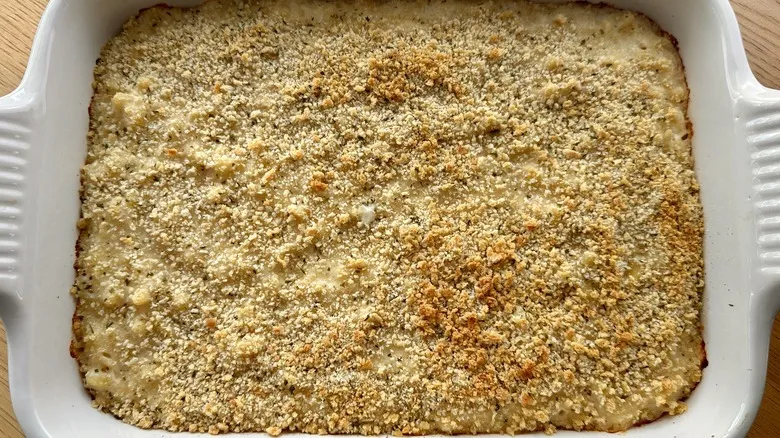
Step 11: Bake the macaroni and cheese if desired
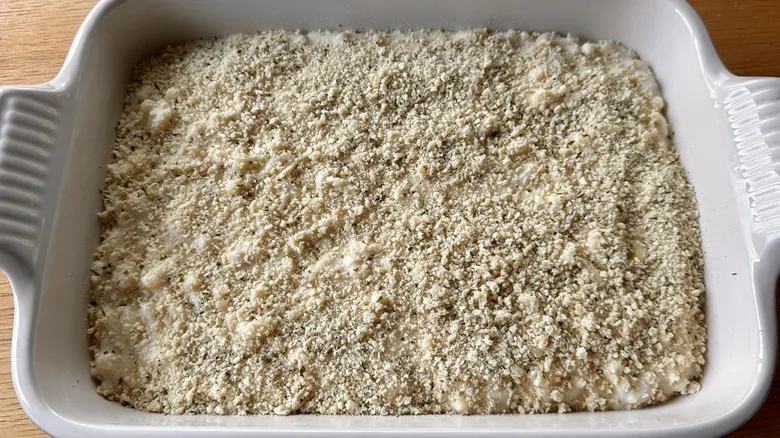
If you are baking, pour the mixture into a 5-quart baking dish, top with panko, and place it on the middle rack of an oven that has been preheated to 400°F. Bake until it is bubbling and golden brown on top, which should take approximately 25 to 30 minutes.
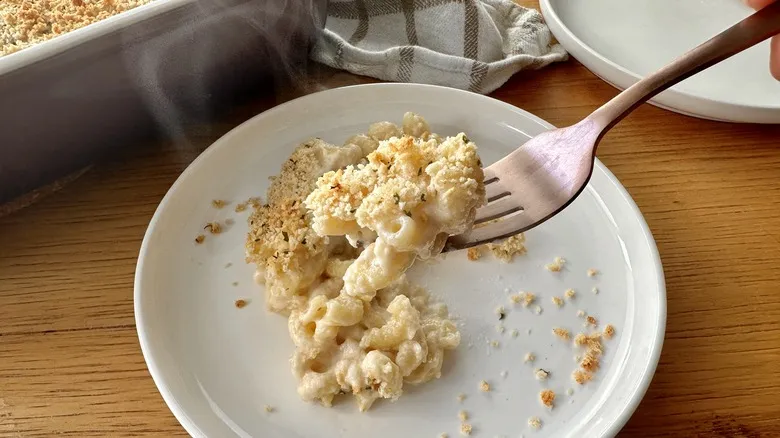
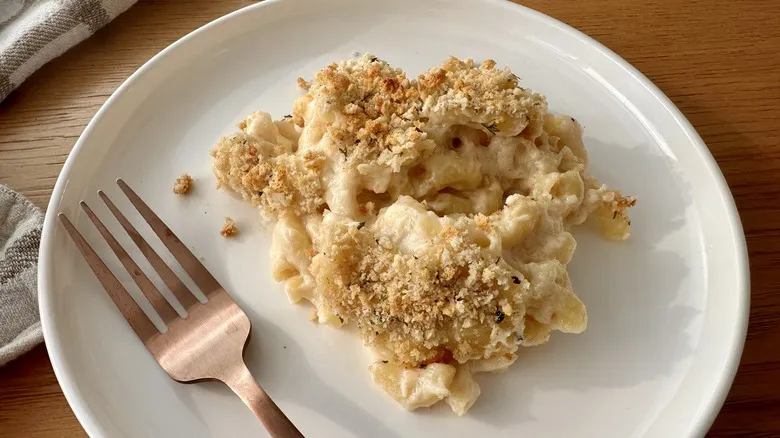
Step 12: Eat it while it's hot
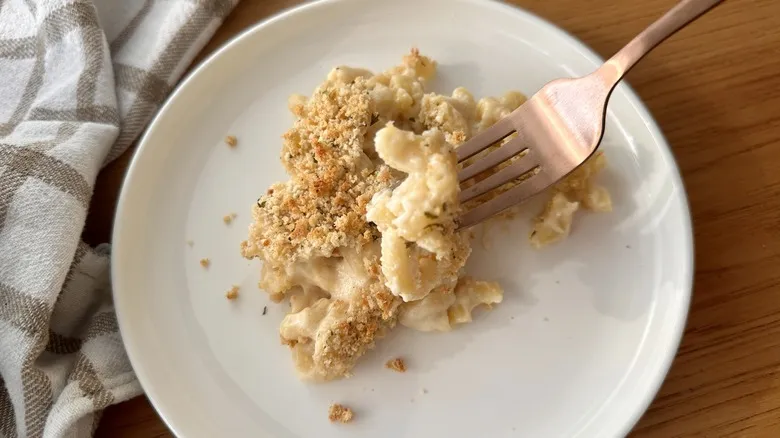
Serve right away.
Which is better, the stovetop or baked version of Homeroom's macaroni and cheese?
One clear benefit of preparing the stovetop version of Homeroom's macaroni and cheese is that it cooks in less time compared to the baked version. The cooking time for the baked option is 55 minutes, while the stovetop method only requires 30 minutes. There are additional reasons to choose the stovetop method, such as having fewer dishes to clean and achieving a smooth, creamy consistency.
Rosenhouse shares her enthusiasm, stating, "I love a good stovetop version of mac and cheese." She believes that "adding a panko topping is a simple way to elevate this nostalgic weeknight dish." She also points out that the baked version offers the advantage of being prepared in advance. According to her, the macaroni and cheese can be stored in the refrigerator in its unbaked form for up to two days before cooking and serving.
How can I serve Homeroom's macaroni and cheese?
Rosenhouse notes, "This mac and cheese is substantial enough to be enjoyed as a main dish," but she also believes it "makes an excellent side." She recommends pairing it with meatloaf or rotisserie chicken, or you could complement it with our recipes for roast chicken or smoky sweet beef short ribs. Speaking of ribs, macaroni and cheese is a traditional barbecue accompaniment, often served alongside cornbread, coleslaw, and potato salad.
If you're serving it by itself, you might want to enhance it with some extra protein, such as crumbled bacon, shredded chicken, or pulled pork (perhaps from a slow cooker). Alternatively, you could serve this mac and cheese with a robust chef salad. For a lighter salad option, consider a green bean and tomato panzanella.
How do I store leftover macaroni and cheese?
This recipe yields a generous eight servings, but Rosenhouse notes that you can easily adjust the quantities to suit your needs. If you find yourself with leftovers—or if you're planning to prepare a large batch ahead of time—you’re in luck: this recipe is ideal for make-ahead meals.
Leftovers can be stored in a sealed container in the refrigerator for up to three days. If you prefer to freeze them, consider portioning them out into individual servings using freezer bags or sealable containers, with a layer of plastic wrap over the casserole to prevent freezer burn.
If you plan to make this dish in advance for later enjoyment, you can prepare the casserole up to the baking stage, wrap it tightly in foil, and freeze it for up to three months. When you're ready to cook it, simply thaw and follow the recipe. It may be beneficial to add an extra 1/2 cup of milk to the béchamel, as the pasta tends to absorb some liquid during freezing.
Recommended

Crispy And Sticky Baked Sesame Tofu Recipe

Chunky Slow Cooker Split Pea Soup Recipe

Monte Cristo Sandwich Recipe

Creamy Roasted Tomato Soup Recipe
Next up