
Don't use the wrong flour
If you don't bake often, you might not have noticed the various types of flour stocked in most grocery stores. In addition to all-purpose flour—the standard option found in many kitchens—you'll also encounter cake flour and bread flour. As their names suggest, these two types serve distinct purposes: Cake flour is soft, fine, and low in gluten, making it perfect for creating pastries with a tender crumb, ideal for cakes and other delicate baked goods.
On the other hand, bread flour is coarser and contains more gluten than all-purpose flour. According to pastry chef Emily Laurae, "Bread flour has a higher protein content than all-purpose flour, which contributes to a chewier texture in bread and promotes a better rise due to increased gluten development."
So, if you're in the mood for a hearty, chewy loaf like a crusty sourdough boule, it’s a good idea to grab some bread flour during your next shopping trip. However, if all you have is all-purpose flour, don’t worry—it’s not a disaster. You’ll still bake an edible loaf, though it may have a slightly different texture and consistency. "All-purpose flour, while more versatile, will produce a softer loaf with a bit less structure, but it remains a solid option for most bread recipes," Laurae notes.
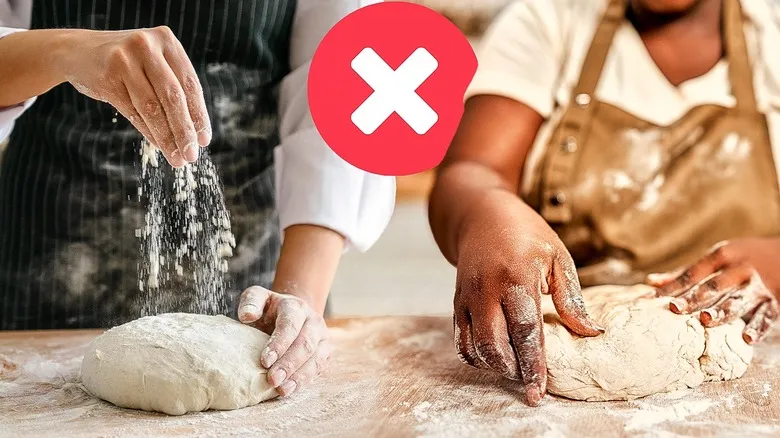
Don't add too much flour
Many bread recipes allow for some flexibility in the amount of flour needed, often providing a range of measurements instead. This variation is due to the fact that different types or brands of flour can behave differently when mixed with liquids, meaning you might require less flour with one type compared to another to achieve the desired dough consistency.
Understanding what the right consistency looks like is crucial. Don’t expect typical bread dough to be as firm as modeling clay; it should feel soft and slightly sticky. Additionally, since it takes a few minutes for dry flour to fully absorb the liquid in the recipe, your dough may initially appear wetter than you want. Resist the urge to add more flour, as this can lead to a dense dough and loaf. Instead, give it a few minutes; the dough will likely thicken to the proper consistency as the flour absorbs more liquid.
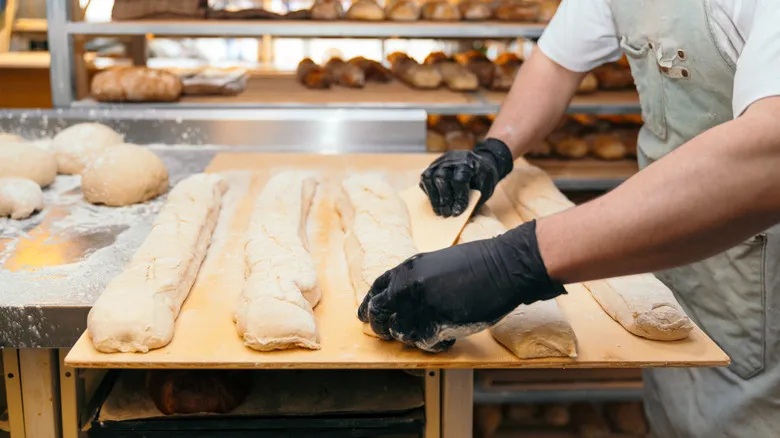
Don't under-knead the dough
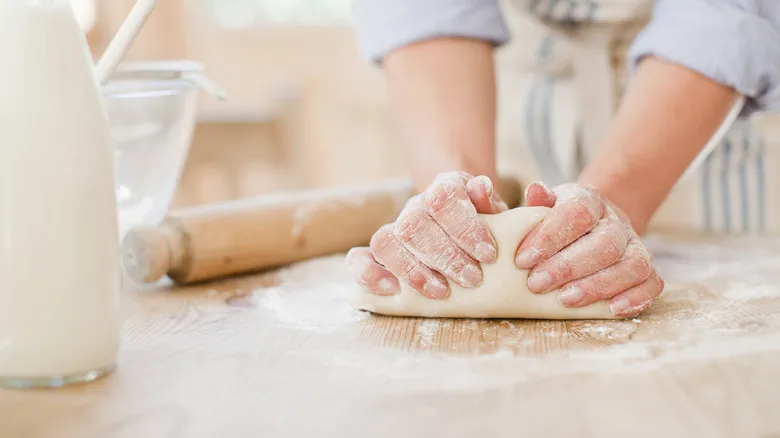
Inexperienced bakers often misjudge the time required to create a loaf of bread, from measuring ingredients to mixing the dough, and then allowing it to rise, shaping it, and finally baking it. One crucial step that is often rushed is the essential kneading of the dough. While this part of the process is enjoyable for seasoned bread enthusiasts, beginners might see it merely as a traditional method to ensure proper mixing. However, this perception is far from accurate: kneading is actually what imparts the bread's light, airy texture.
Chef Ben Randall notes, "When kneading by hand, the most common mistake people make is not kneading long enough. You should feel tired and perhaps a bit sore after thoroughly kneading the bread." This is because kneading is vital for developing the bread's structure.
Chef Emily Laurae elaborates, "Kneading should involve stretching and folding the dough in a manner that promotes gluten development without tearing it, using the heel of your hand in a gentle, repetitive motion." Typically, hand-kneading takes around 8-10 minutes, although this can vary depending on the type of dough and individual technique. To determine if your dough is ready, you can perform the 'windowpane test' — stretching a small piece to see if it creates a thin, translucent layer without breaking. If the dough is pliable enough to form a windowpane, she confirms, it is ready to proceed.
Beware of old or bad yeast
In addition to flour, yeast is a crucial ingredient that defines bread: it is what sets apart a light, fluffy loaf from a heavy, unappetizing mass of dough. Unlike other leavening agents like baking powder and baking soda, yeast consists of living organisms. As yeast consumes the sugars in the dough, it produces carbon dioxide, which creates bubbles that contribute to bread's airy texture. Therefore, the effectiveness of your bread's rise is directly linked to the vitality of your yeast.
This variability in yeast behavior can make baking bread somewhat unpredictable. Chef Ben Randall suggests taking precautions to improve your chances of success. "It's advisable to stick to what the recipe specifies, but generally, active dry yeast is the most dependable and has a longer shelf life," he notes. "'Quick rise' active dry yeast can alter the rising time of your dough, leading to unpredictability. Fresh yeast (found in the dairy section of grocery stores) is excellent, but it is perishable and can die if not used promptly."
Many recipes instruct to combine dry yeast with a small amount of liquid and let it sit until it becomes foamy before mixing it with the flour, and there’s a good reason for this step. "This is a reliable way to ensure the yeast is active," Randall clarifies. To further safeguard the yeast, he recommends avoiding the addition of salt too early in the mixing process, as it can weaken or kill the yeast.
Pay attention to the proofing stage
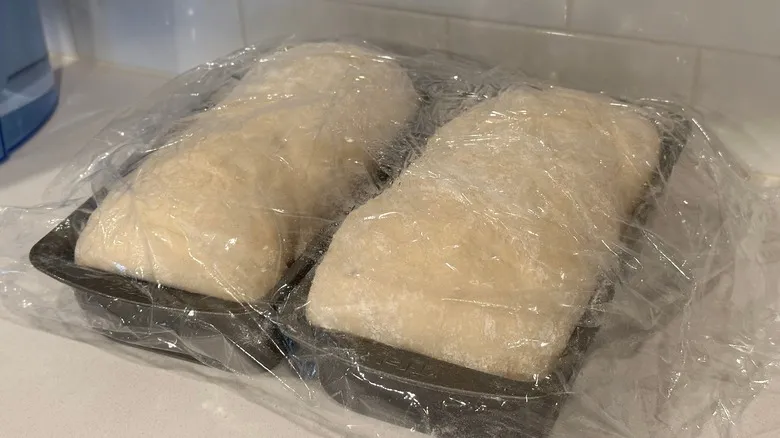
Even those who don’t bake regularly understand that bread dough needs time to rise before baking. However, many casual bakers might overlook the fact that most loaves actually go through two rising phases. "After preparing your dough, you let it rise until it has roughly doubled in size," explains chef Ben Randall. "Next, you shape your loaf, which may involve dividing the dough into smaller portions for shaping. The second rise occurs afterward, creating the bubbles and air pockets that contribute to the final loaf's texture."
The second rising phase, often referred to as the proofing stage, is just as important as the first. "This second rise is crucial for developing the loaf's texture and flavor, as it allows the dough to relax and form a light, airy crumb," says Emily Laurae. Therefore, it's essential to allocate enough time for both rising periods. However, keep an eye on your loaf to avoid over-proofing. "To check if it's ready, gently press your finger into the dough; if it springs back slowly, it’s properly proofed. If it doesn’t spring back, the dough may be over-proofed," Laurae advises. "Over-proofed dough can lose its shape and may bake into a flat, overly soft texture due to excessive gas release."
Be sure to bake your loaf long enough
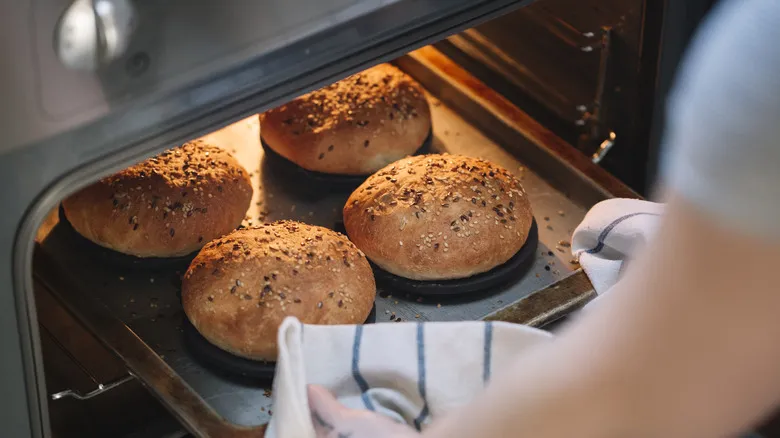
Another challenging element of bread-baking is figuring out whether your loaf is completely baked, as it can appear beautifully browned and risen long before the inside is fully cooked. While recipes typically provide suggested baking times, they aren't foolproof. Chef John Oechsner points out that the temperature readings on home ovens are often unreliable, meaning you might be baking at a higher or lower temperature than you realize. "I believe all ovens are inaccurate until proven otherwise," he cautions. "It's wise to check your oven with a thermometer to ensure it's properly calibrated."
Once you've verified that your oven temperatures are correct, you can have a bit more confidence in your recipes. However, the most reliable way to determine if your loaf is done is through a physical check. "Breads with a crisp crust will produce a hollow sound when tapped on the bottom with your knuckles," Oechsner explains. "Of course, this method doesn't work for rich sweet breads like brioche, cinnamon rolls, or babka. In those cases, use an instant-read thermometer to check that the internal temperature reaches 185 degrees. For denser whole grain loaves and sourdough breads, aim for an internal temperature of about 205 degrees."
Don't try to slice it while it's still hot
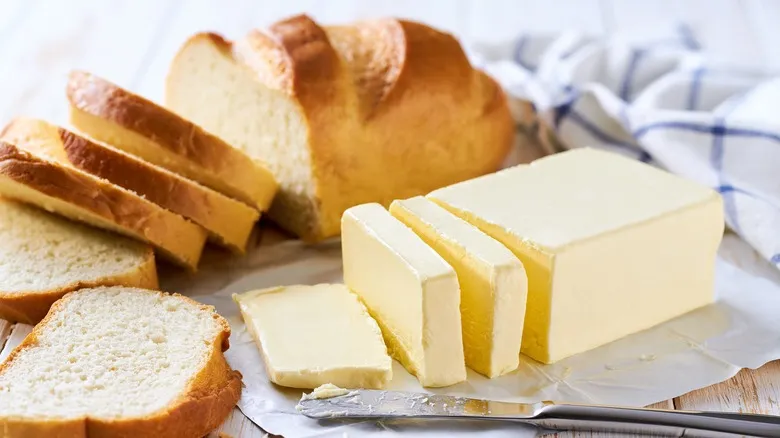
Few aromas are as enticing as a freshly baked loaf of bread straight from the oven. It's hard to resist the urge to dive in and slather a warm slice with butter—or to follow the latest trend of a butter and bread tasting experience—so you can savor it at its peak freshness, and many enthusiastic home bakers do just that. However, seasoned bakers understand that while the scent of hot bread is delightful, it’s not the ideal time to enjoy it.
"Letting bread cool completely allows the internal steam to escape and ensures the crumb sets properly, preventing a gummy, moist texture," explains chef Emily Laurae. "Cutting too early releases steam too soon, resulting in a denser and stickier interior. A little extra patience will yield a better crumb and a cleaner, easier slicing experience!"
If you’re eager to enjoy warm, fresh bread with your meal, you can still do so: simply wait for it to cool, slice what you need, and gently reheat it. This way, you’ll still experience that freshly baked aroma, along with neater slices and a more satisfying texture.
Don't handle the dough too little or too much during shaping
Shaping a loaf of bread is more challenging than it appears. Even a basic round boule demands a skilled touch and some technical expertise—simply rolling it into a ball won't suffice. "In general, shaping involves tucking the dough underneath itself to create tension in the 'skin' on top, which helps maintain its shape during baking," explains Ben Randall. The trick is to be both gentle and thorough, ensuring the dough is handled just the right amount. "If the dough isn't shaped tightly enough, it will spread instead of rising in the oven, while excessive handling can cause it to deflate," adds Emily Laurae.
Many bakers tend to dust their work surfaces heavily with flour while shaping their loaves, hoping to prevent stickiness and gain better control, but this can lead to problems. "A common error is using too much flour on the counter when shaping," warns John Oechsner. "This can hinder the dough from gaining traction on the surface, which in turn prevents the necessary tension from forming, resulting in a loose final shape."
If you're dividing the dough into several pieces, you might find that they become stiffer and more difficult to shape. Instead of resisting this, allow the pieces to rest. "Another mistake is not giving the dough enough time to rest after it has been scaled and rounded," Oechsner advises. "Rounding tightens the gluten, making shaping harder, so it should rest for at least 20 minutes."
Be sure to measure your ingredients properly
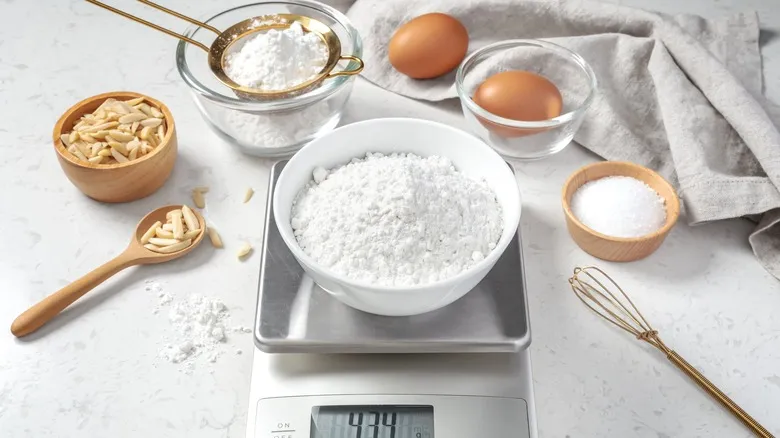
Many traditional types of bread feature incredibly straightforward ingredient lists. For example, many crusty white breads consist solely of flour, water, yeast, and a pinch of salt, while basic white sandwich bread might include milk, butter, and perhaps a hint of sugar or honey. Due to their simplicity, the precise ratios of these ingredients are crucial—each component contributes to the loaf's structure and texture, so incorrect proportions can spoil the final product.
This is why professional bakers, whose success relies on producing consistently excellent loaves, prefer to measure their ingredients by weight using a scale instead of measuring cups. Weight measurements guarantee that you achieve the same quantity each time, whereas the amount of flour or yeast that fits into a measuring cup or spoon can vary based on how compactly you fill it.
Don't toss your wonky-looking loaves
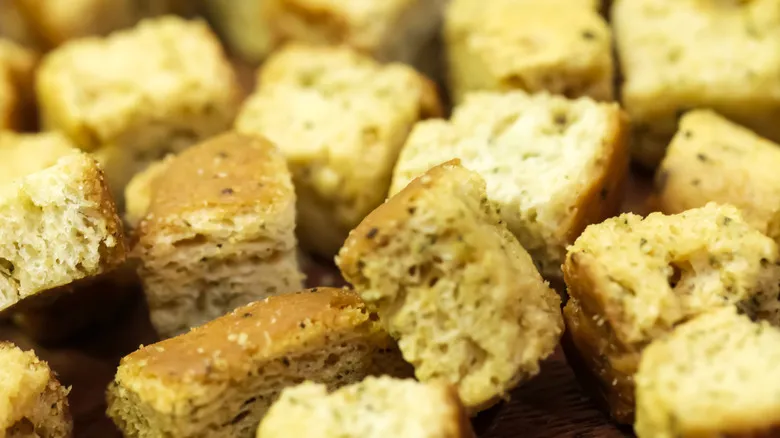
It's disheartening to invest hours into a bread-making endeavor only to end up with a dense, burnt, or misshapen loaf that you wouldn't dare serve. First, don’t be too hard on yourself—this is a common experience for many bakers. Second, regardless of how embarrassed you feel about your baking mishap, don’t throw that loaf away. Unless it’s completely charred or contaminated, you can easily transform it into a variety of delicious dishes.
If you find yourself with a loaf that’s too unsightly for the bread basket, consider cutting it up and repurposing it into croutons, French toast, or bread pudding. Culinary traditions around the globe have created numerous recipes to utilize stale or unwanted bread. For example, Italian cuisine features panzanella—a refreshing tomato salad with toasted bread cubes that absorb the flavorful juices—as well as various soups thickened with softened bread. Alternatively, you can always grind your imperfect loaf into breadcrumbs, which can be used for breading or as a binder in meatloaf.
Don't give up if your first loaf doesn't work out

While a failed attempt at baking bread can feel disheartening, don’t let it deter you from giving it another shot. What makes bread baking captivating for experienced bakers—and often frustrating for beginners—is that every loaf presents a unique experience, even when using the same recipe. For example, flour tends to absorb more moisture in dry conditions compared to humid ones, which means you'll need to tweak the ratios of flour and liquid ingredients each time you bake. Additionally, yeast reacts differently depending on the season: during warm summer days (or in heated kitchens), yeast activates more quickly, leading to faster rising times. Therefore, even if you meticulously follow a recipe, the outcomes can vary significantly from one occasion to the next.
The key to producing consistently great loaves lies in understanding how your flour and yeast respond through observation and touch. The only way to gain the insight needed to determine when your dough has the right texture or has risen enough is through practical experience. So keep experimenting—the rewards will be well worth the effort.
Recommended
When Softening Butter, Patience Is Key
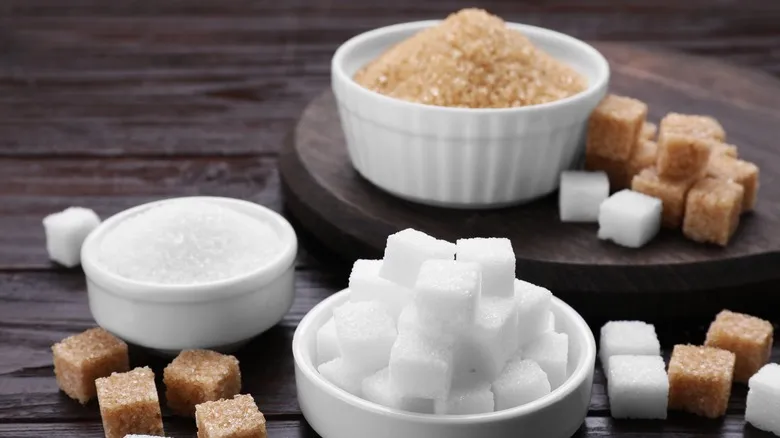
How Many Cups Of Sugar Are In One Pound?
Yes, You Can Freeze Sourdough Starter. Here's How

Ina Garten Might Just Have The Answer For Your Collapsing Carrot Cake
Next up