
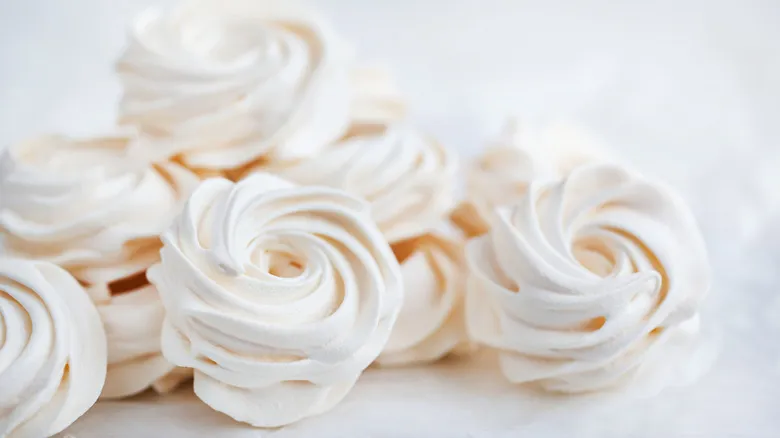
1. Procrastinating after making the meringue base
I hold no one accountable for needing a moment to relax after whipping up meringue. You’ve earned the right to admire those delicate peaks of perfection! But don’t linger in celebration too long — they can lose their structure over time.
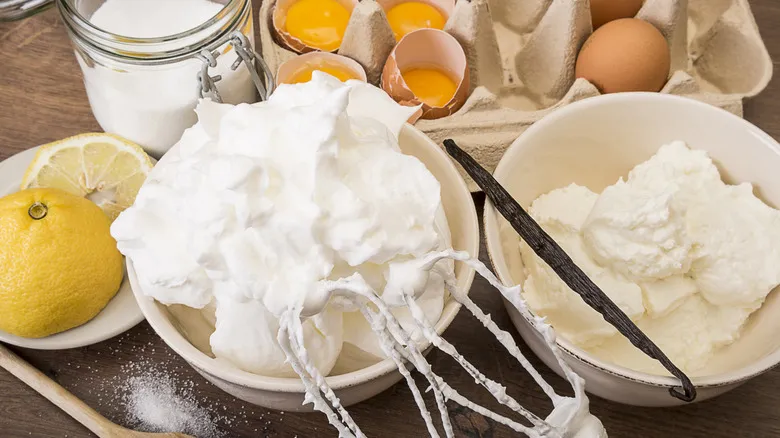
To create meringue, egg whites are whipped vigorously into a light foam. This constant mixing causes the proteins in the whites to unfold and bond, forming a fragile yet reinforced network around the water and air incorporated during whipping. In the case of an uncooked meringue, like a French meringue made simply from whipped sugar and egg whites, this network is particularly unstable and can quickly break down, leading to the release of water and air, which results in separation. That’s why you might find a pool of water at the bottom of your bowl if you over-whip or let it sit too long. It’s also the reason we dreaded being tested on French meringue in pastry school, as our chef instructor would deliberately take his time moving from student to student to evaluate us.
This network can be further stabilized with additional ingredients — which is why some recipes call for cornstarch or acid — or by preparing a cooked meringue. Swiss and Italian meringues are much more stable; Swiss meringue is made by heating the egg whites and sugar to a specific temperature before whipping, while Italian meringue involves slowly adding hot sugar syrup to the whipped whites.
When meringue is baked, the heat causes the proteins in the egg whites to coagulate and firm up, while also evaporating the water. This process is most effective when the meringue — whether Swiss, Italian, or French — is as fresh and structurally intact as possible before any separation occurs. For optimal baking results, it’s best to transfer the meringue to the oven within thirty minutes of whipping.
2. Forgetting to line your baking sheets with parchment paper
It's a mistake you'll only make once: neglecting to line your baking sheets! Without a liner, you're destined for disaster. Your meringues will cling stubbornly to the sheet, refusing to budge. This is practically a rule of baking. You'll end up in a crumbly struggle, with many ingredients sacrificed in vain. Take it from someone seasoned in the kitchen, with plenty of battle scars: save yourself the hassle and waste by properly preparing your baking sheets.
Choosing the right liner is crucial when baking. Nonstick sprays and liners like wax paper or silicone mats are not ideal for delicate foams like meringue. The fat from nonstick sprays, the slick surface of wax paper, and the thickness and residual greasiness of silicone mats can disrupt the meringue's structure. These factors can prevent your meringues from achieving a crispy bottom and may cause them to spread too much. As a result, the fragile interior may turn out chewier than you intended.
Aluminum foil is another material to steer clear of, as it leads to uneven baking. Due to its excellent heat conductivity, the meringue bottoms in direct contact with the foil will cook much faster than the tops. My go-to option is a single layer of ungreased parchment paper. Its thin, heat-resistant nature creates the perfect barrier without the risk of sticking.
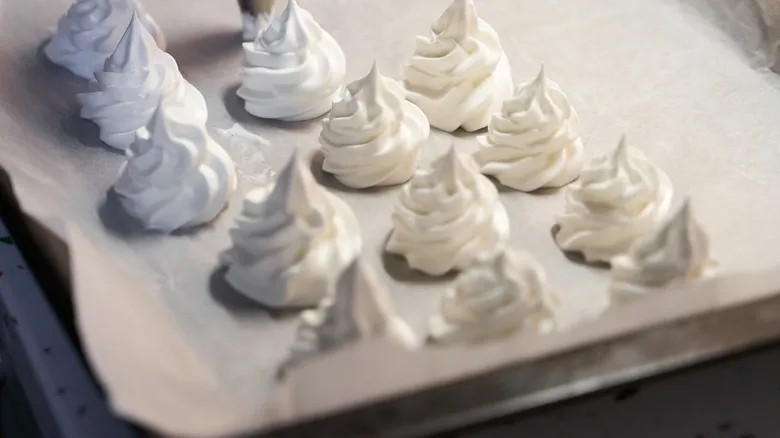
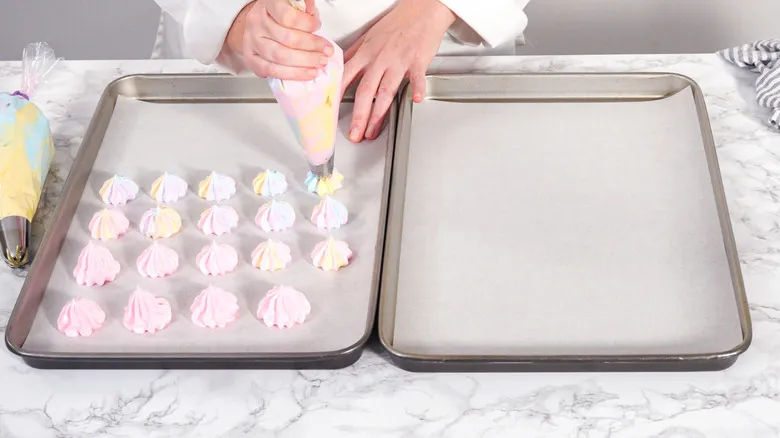
3. Overcrowding the baking sheet
One common mistake is placing too many portions on a single baking sheet without allowing enough space between them. Overcrowding compromises the essential airflow, leading to numerous issues that can ruin your recipe.
This is especially problematic with meringues due to their delicate nature. The wet, sticky portions can easily merge, and insufficient exposure to heat and air will hinder the formation of a dry, crisp crust on the outside.
When preparing multiple meringue portions, such as cookies or shells, it's important to first determine how many can fit on a single baking sheet while maintaining adequate spacing. Aim for about ½ inch of space between each meringue. This simple preparation step is a standard practice in nearly every pastry kitchen I've worked in before placing anything on the baking sheet. Depending on the size of each piece and the required spacing, we calculate the number of units that can fit in each row and column.
If you make a mistake in positioning the meringue on the parchment paper, it can be quite messy to correct. A helpful tip from pastry kitchens is to mark the exact locations for each unit on the back of the parchment paper using a pencil or marker. This eliminates the guesswork of arranging them and reduces the risk of sticky errors that are hard to fix.
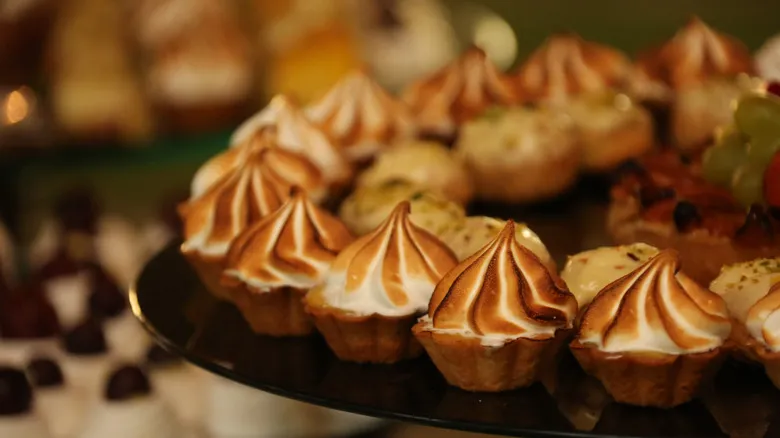
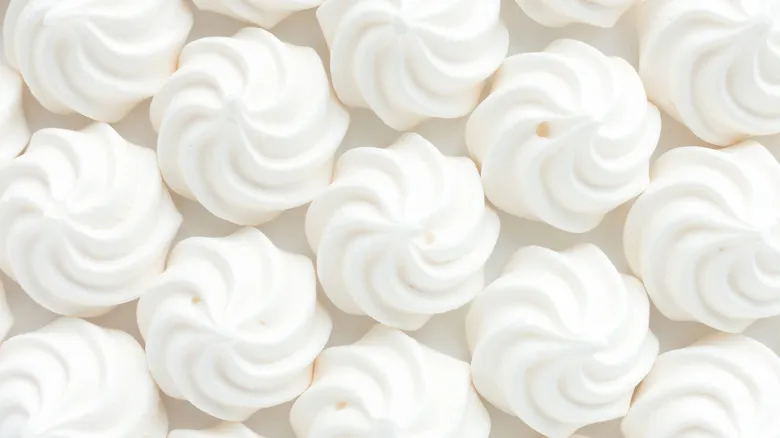
4. Shying away from a piping bag and tip
Have you ever wondered why meringue cookies appear so flawless? Do you marvel at the intricate swirls and twirls of rosettes, or find yourself captivated by the perfectly rounded teardrop shapes? Why don’t your meringues turn out like those?
If you find it challenging to create perfect shapes, you may be lacking some key pastry tools. Even if you’re not a seasoned cake decorator, don’t shy away from using a piping bag with a tip. This powerful combination provides the best control and consistency for achieving precisely sized meringues. With a bit of practice to refine your technique and boost your confidence, your meringues can look just as stunning as those made by professionals.
Once you master it, a piping bag allows for quicker, cleaner, and easier portioning compared to using a spoon and hoping for the best. A saying my first baking mentor often shared with me before tackling a new task was to work smart, not hard! Unless you’re intentionally aiming for a freeform style, like whimsical peaks or dollops, you’ll find yourself facing more effort and creating more mess without a piping bag and tip.
For optimal control and a firm grip, fill a 12-inch or 16-inch piping bag only halfway with your meringue mixture—you can always refill it as needed. When it comes to tips, use a round tip for a smooth finish to create teardrops or circles, and a star tip for crafting rosettes with defined, sharp edges.
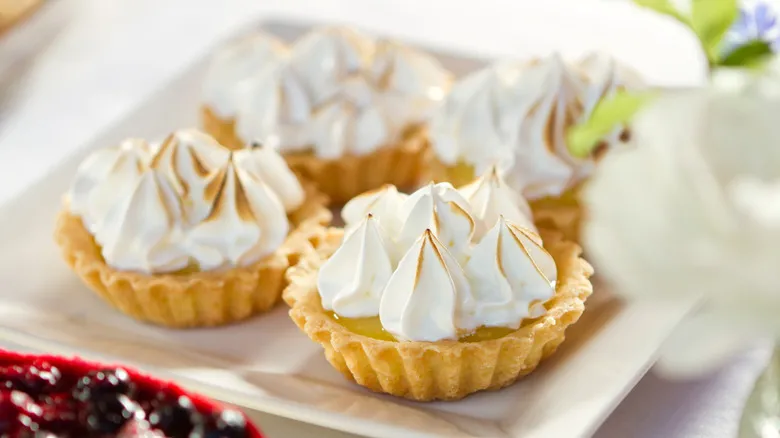
5. Spreading meringue on a pie incorrectly
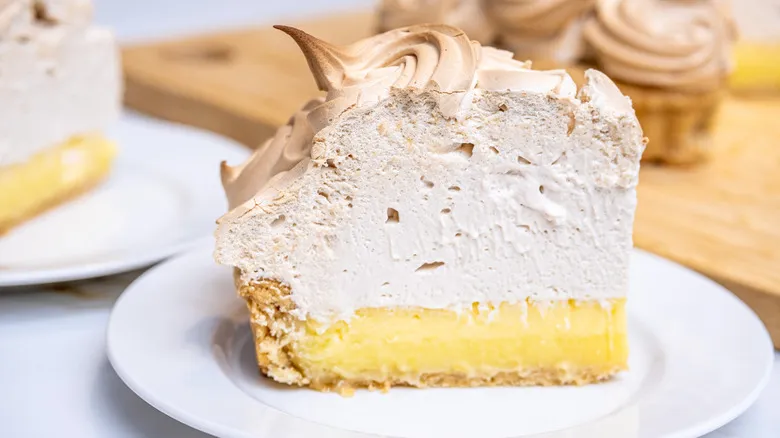
If you find yourself frustrated by the persistent problem of a wet puddle forming beneath your slippery meringue every time you bake a lemon meringue pie, I can explain why this occurs and provide you with the solutions to prevent it from happening again. Let's concentrate on the technique for spreading the meringue over the curd or custard filling.
The first mistake is applying the meringue to a completely cooled filling. It's essential to spread the meringue over a warm — not cold — cooked curd or custard filling before baking. The residual heat and direct contact help to gently warm the bottom of the meringue, effectively sealing the layers together and preventing any separation or slippage.
The second issue is that you may not be spreading the meringue far enough. If the meringue doesn't reach and touch the pie crust, it will release moisture as it bakes, leading to a watery layer forming between the meringue and the filling. Additionally, without the extra support of adhering to the crust, the meringue is more likely to shrink during baking, further exposing the filling. If you can still see some curd or custard beneath the meringue while spreading, keep going — you haven't spread it far enough!
6. Ignoring weather and humidity levels
In an ideal world, humidity wouldn't interfere with our meringues... or our hairstyles! However, reality often jolts us out of such unproductive fantasies. The truth is, there will never be a flawless day for making perfect meringues. You can't schedule your baking around the weather, especially when you have events marked on your calendar. That's why it's essential to be proactive and adapt to less-than-ideal weather conditions.
On hot, humid, or rainy days, be ready to increase the baking time. The added moisture in the air causes the sugar to absorb more humidity, which slows down the drying process of the meringues. If you bake them for the same duration as you would on drier days, they will end up undercooked.
Resist the urge to raise the oven temperature. A higher setting can lead to excessive browning and poor structural integrity. Meringues should be baked at a low temperature for a longer period. Exercise patience and allow for the extra time needed, which could range from 30 minutes to an additional hour or even two.
For a personal favorite pie tip on particularly hot and humid days, I skip the oven altogether. Instead, opt for a heat-treated Swiss or Italian meringue. When it's time to serve, spread the meringue and use a blowtorch to achieve a beautifully browned exterior. This method gives the crust an oven-toasted appearance while keeping the center soft.
7. Setting the oven temperature too low or too high
Baking meringues at temperatures that are too low or too high can negatively affect their final texture and flavor. Achieving the correct oven temperature is crucial. When aiming for crisp cookies that maintain a light color, baking at a low temperature can hinder the proper development of the meringue's texture. Conversely, baking at a high temperature can cause the outer layer to cook too quickly, potentially burning it, while leaving the center too soft and chewy. Both scenarios increase the chances of your meringues weeping or forming beads, which occurs when sugar granules haven't fully dissolved and start to release moisture.
The optimal temperature range for baking meringue cookies or shells should yield a dry texture, sturdy structure, and minimal to no browning. I recommend setting your oven temperature between 200 and 250 degrees Fahrenheit. For the best results, consider using an oven thermometer to accurately gauge the temperature and make necessary adjustments.
However, when it comes to baking a thick layer of meringue on a pie, the same guidelines for cookies do not apply. Meringue on a pie should have a slightly browned exterior and a spongy interior that has a gentle jiggle. A higher temperature is needed compared to baking cookies to ensure the meringue cooks thoroughly without the center drying out completely. The ideal temperature for this purpose is between 325 and 350 degrees Fahrenheit.
8. Not knowing when meringues are done baking
Although the recommended baking time in a recipe serves as a useful guideline, it shouldn't be your sole indicator for determining when meringues are completely baked. It's essential to engage your senses—sight, touch, and more.
The specific type of recipe will affect how you assess doneness. For meringue baked on a pie, expect a baking time of about 15 to 20 minutes, during which it should develop a slight browning on the outside and exhibit a gentle jiggle when shaken. However, to eliminate any risk of consuming raw eggs in a French meringue, it's wise to take a more precise measurement. I prefer to use a probe thermometer to check the internal temperature, inserting it into the center. According to the USDA's Safe Minimum Temperature Chart, eggs are considered fully cooked at a minimum of 160 degrees Fahrenheit.
When it comes to cookies or meringue shells, internal temperature is less of a concern since they bake for a longer duration. Due to varying moisture levels in the air and the eggs, they may take anywhere from one to three hours to dry completely. At the one-hour mark, select one cookie to evaluate several indicators: if the bottom releases cleanly from the liner upon removal, if the exterior feels dry to the touch, and if the interior is dry when broken open, then it's time to take them out. Alternatively, if you prefer not to sacrifice any, gently tap the meringue to see if it sounds hollow. If the meringue is still sticky, continue baking and testing in 30-minute intervals.
9. Cooling too hastily
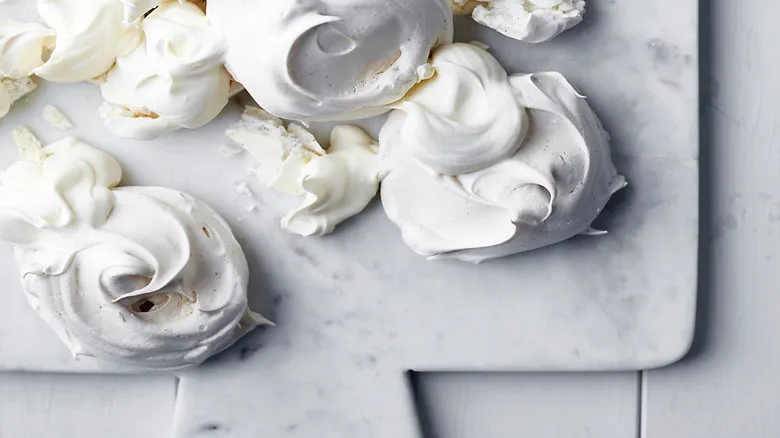
Don’t assume that the work is done once the meringue has (finally) finished baking. The cooling phase needs to be gentle and gradual, avoiding any drastic temperature shifts. I still remember a painful incident in a restaurant kitchen when a batch of perfectly crunchy meringues turned mushy because a prep cook, in need of the oven, moved them straight to the walk-in cooler without informing me. He didn’t realize the unfortunate repercussions, and I attribute that mishap to a lack of communication! Whether you’re sharing your kitchen with coworkers, roommates, partners, or family, ensure that everyone knows you’re cooling meringue and that they should leave it alone!
For cookies or shells, let them cool gradually while still on the baking sheets in the oven. Allowing the meringues to cool completely in the oven provides a safe and controlled environment for the drying and setting process to occur slowly and gently. Turn off the oven and slightly prop the door open to help regulate the release of heat and moisture.
If you’ve baked a meringue on top of a custard or curd pie, it’s essential to let it cool completely before serving. Cutting into the pie right after baking will result in both the meringue and the filling being unset, leading to a messy, liquidy disaster. Again, don’t rush the setting process! Allow the pie to cool and set fully at room temperature—avoid the refrigerator—for six to eight hours before slicing and serving.
10. Storing incorrectly
Due to its fragile nature, baked meringue is best enjoyed as fresh as possible. However, there are effective strategies for short-term storage. The primary goal is to prevent moisture absorption, which can lead to a soft and soggy texture.
For meringue cookies and shells, it's advisable to add wet ingredients (such as whipped cream or fruit sauce) only right before serving to maintain their crispness. If these components are added in advance, the meringues will lose their texture and become mushy. They should be stored at room temperature in a dry area, away from sunlight and heat sources, in a well-sealed airtight container. A dry pantry is perfect for this! When stored properly, they can remain fresh for up to a week without compromising their texture. Once baked and stored correctly, meringue cookies can touch each other without sticking.
Meringue-topped pies are best enjoyed on the day they are made, after allowing sufficient time to set. For short-term storage, keep the pie at room temperature, loosely covered, for no more than one additional day. You can refrigerate the pie for up to two or three more days, but be aware that it may start to deteriorate in the cooler environment, leading to a weeping meringue and a soggy crust.
Recommended
The Step You Need To Take When Your Bread Dough Becomes A Sticky Mess
The Baking Product That's Your Secret Weapon To Stress-Free Cakes
Give Your Stovetop A Break And Bake Your Grits Instead

The Hot Dog Focaccia Hack You Need For An Elevated Game Day Snack
Next up